
 This is not a tutorial but rather a few photos for those of you who like to see how things are made. Above you can see a number of .5 mm veneers of 3 different species of wood glued up. For the rosette I am using now I have to make three different sandwiches. Strips, which will be thinned to about 0.5 mm, are cut off of each one.
 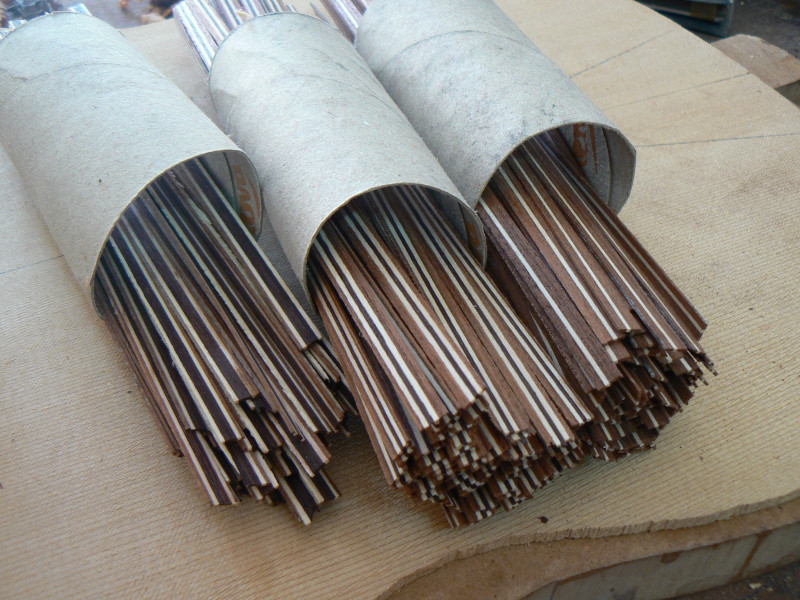 I then give each strip the very slight wedge shape that you can see by looking ot the thicknesser in the photo below. Usually this tool is used to thin purfling strips by pulling them through using a different blade.
 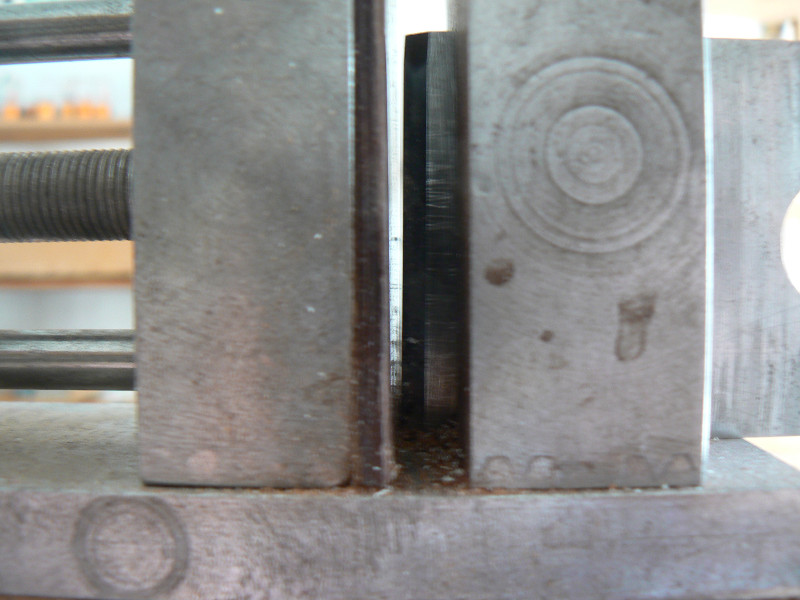 The next step is to glue the strips together in a round mold which ensures that each section (tile) will butt up against the next and conform to the inner and outer circumference.
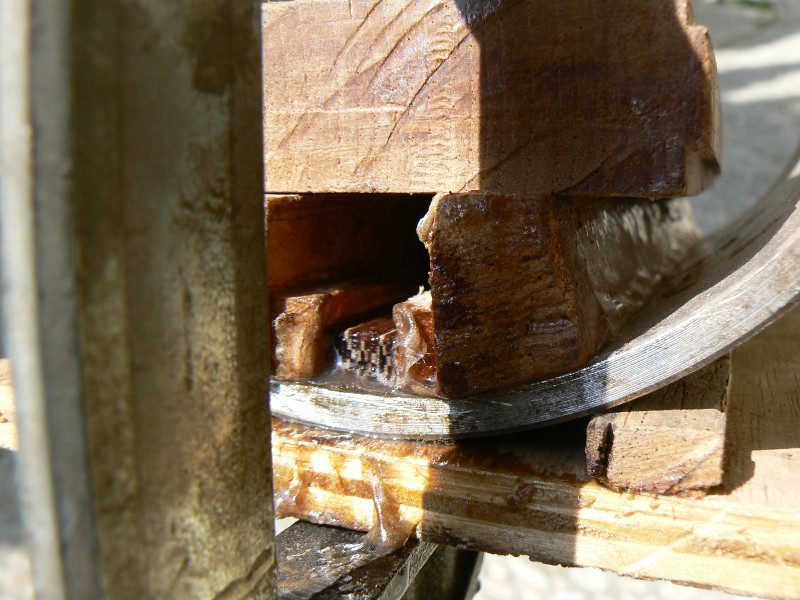 I took another photo after I took the clamps off and cleaned up the end grain so that you can see everything more clearly. Making rosettes is a lot of work but it is quite a simple way of doing it.
 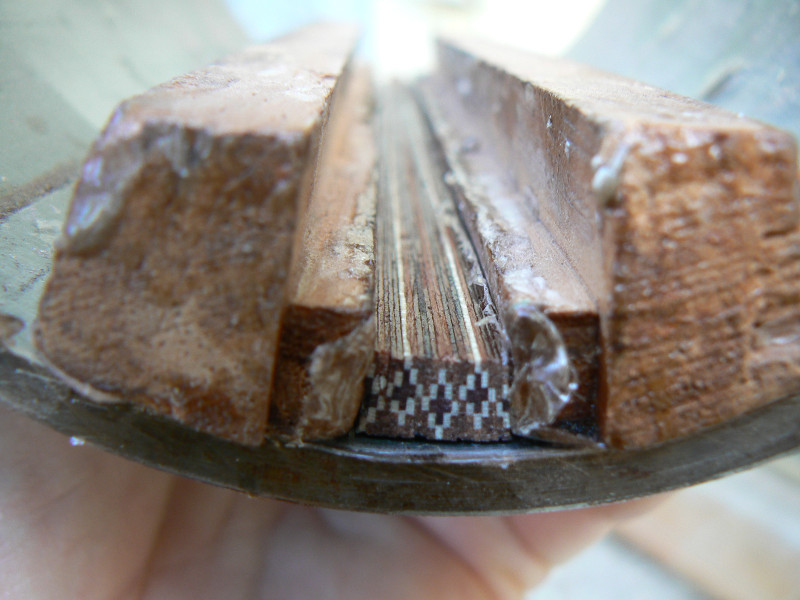 Now each slice is cut off and you can place them end to end to make a full circle with the diameter of the centre of your rosette. The first time you do this there is some trial and error or geometric calculations to do.
 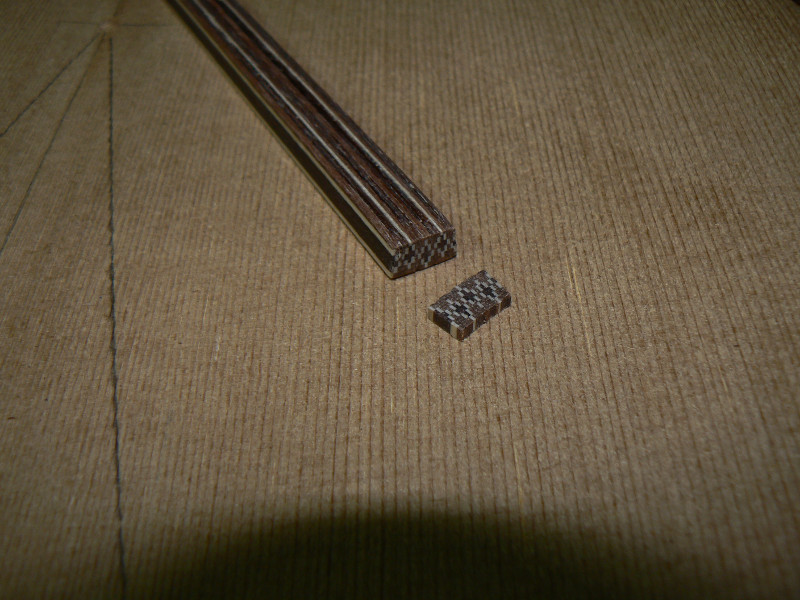 Working this way you can inlay the strips and the tiles all at once. You want a reasonably tight fit so you have to put the veneer strips in first and then force the tile in between so that the strips are pressed against the walls of the channel.
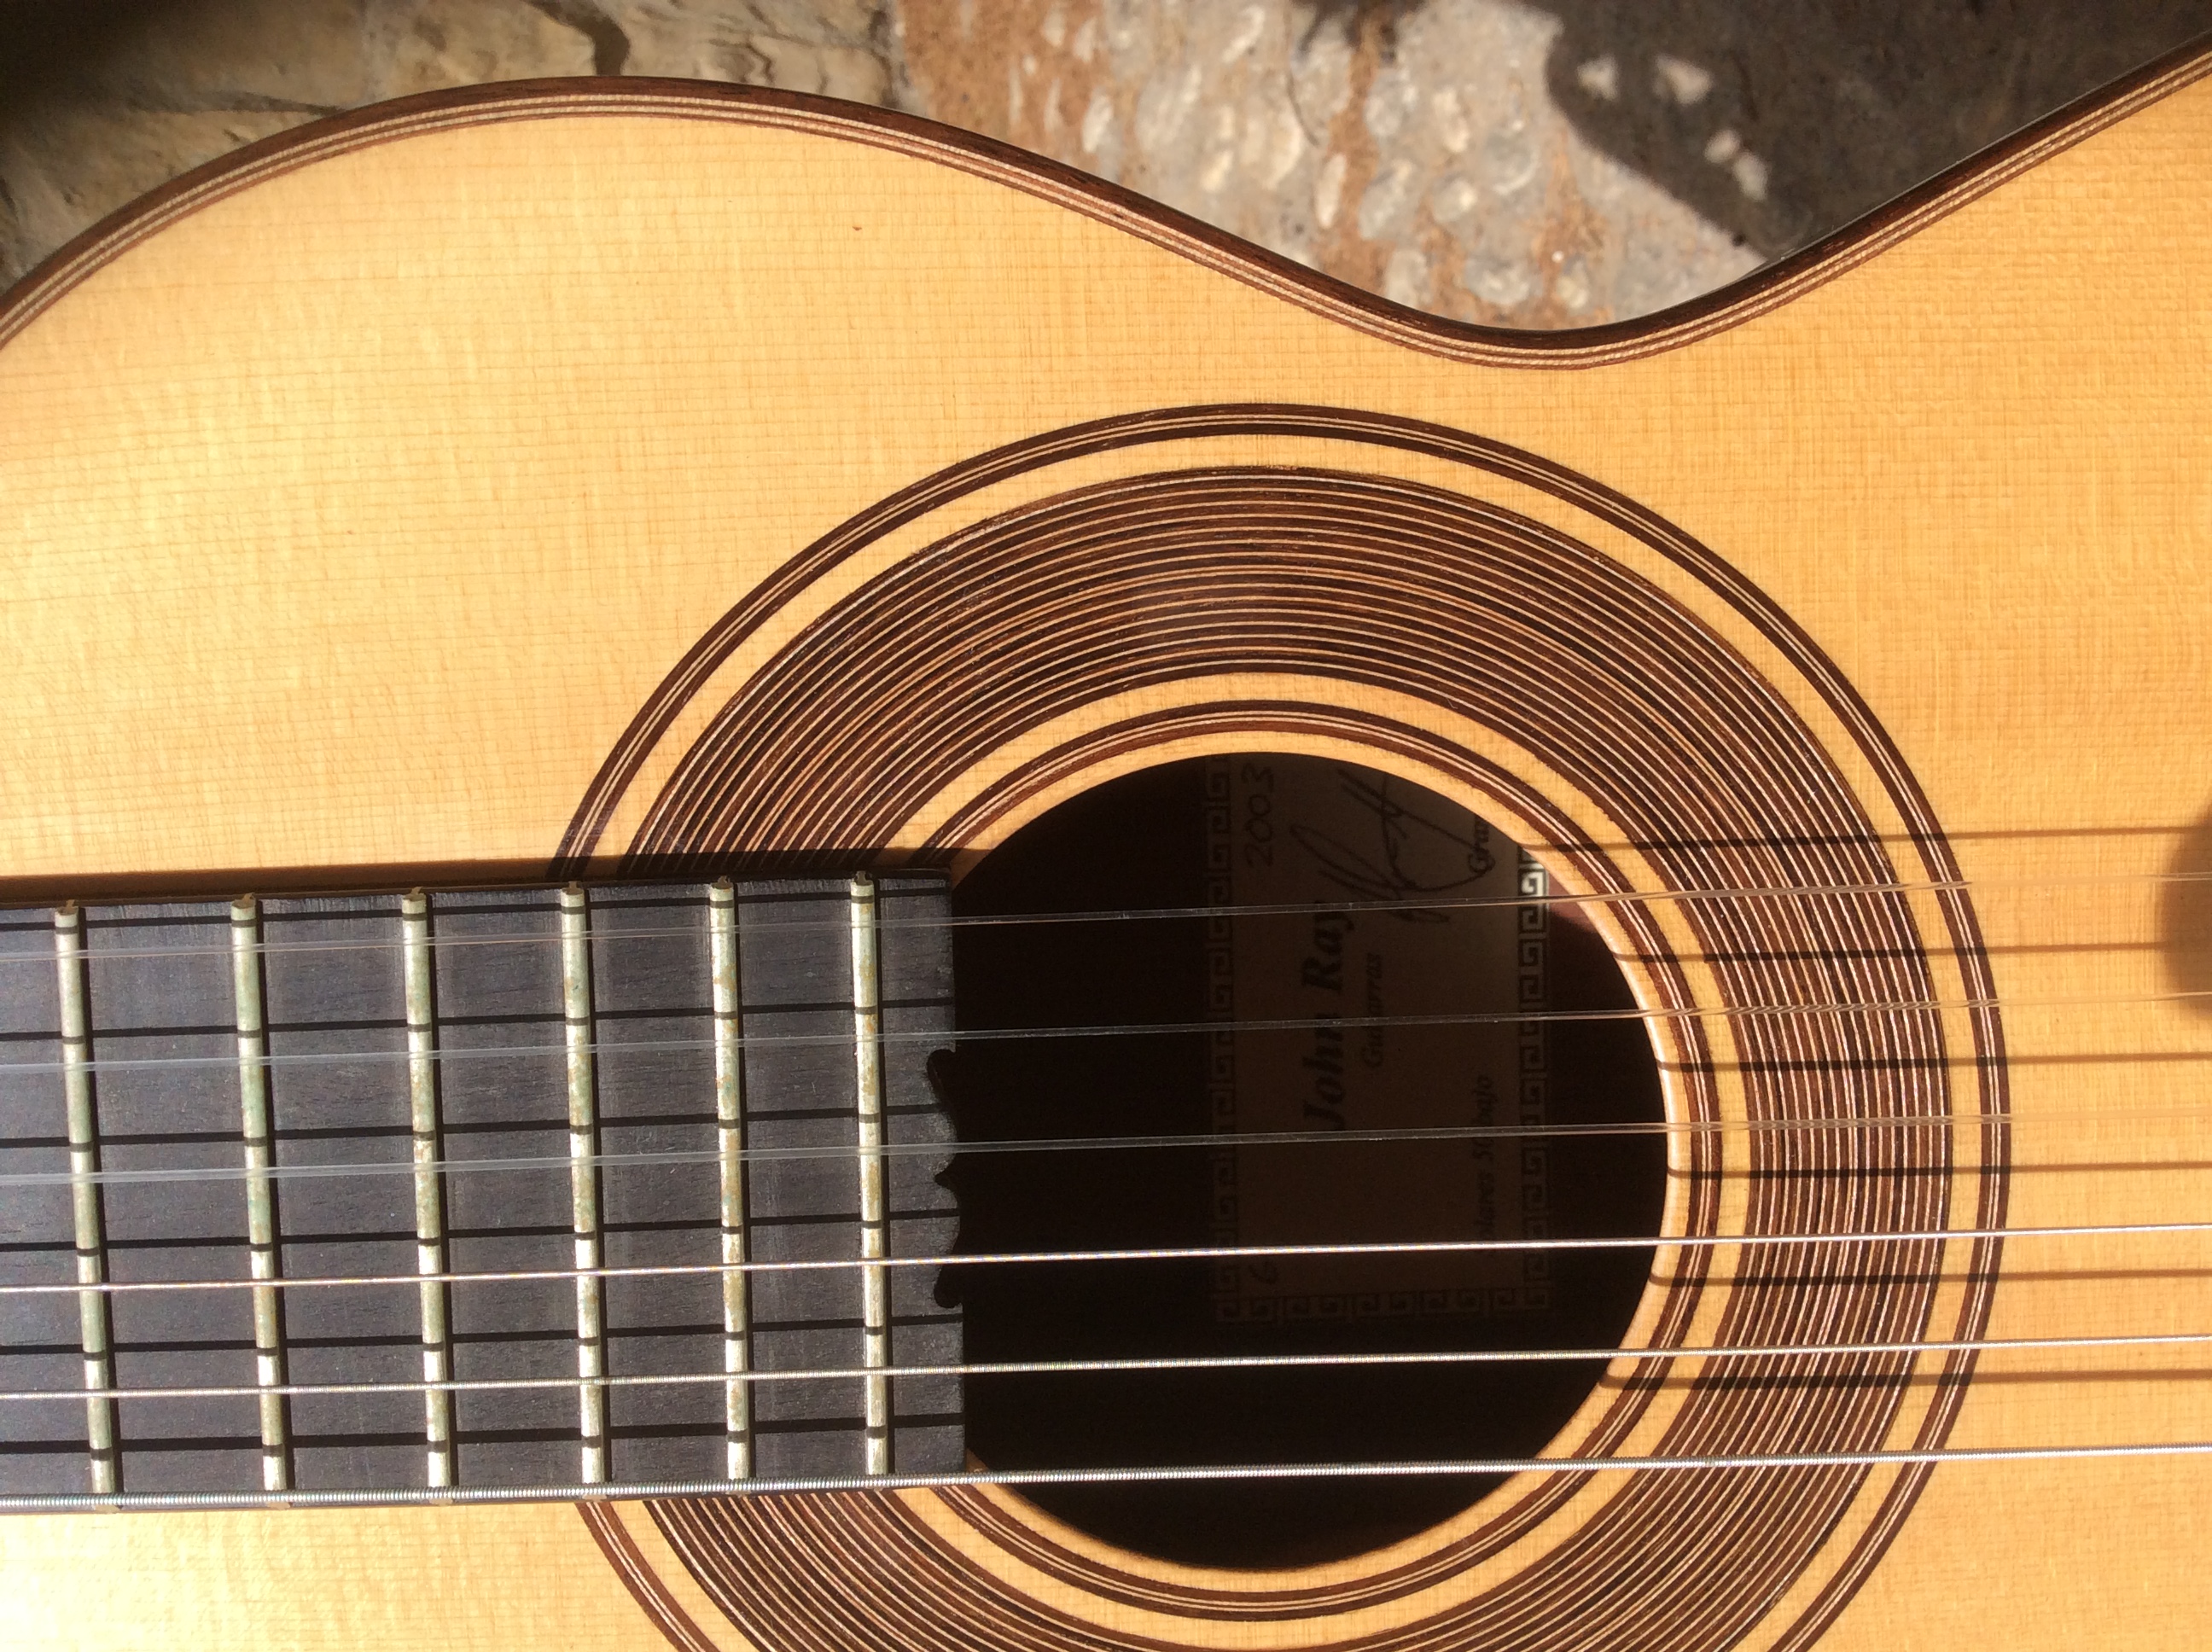
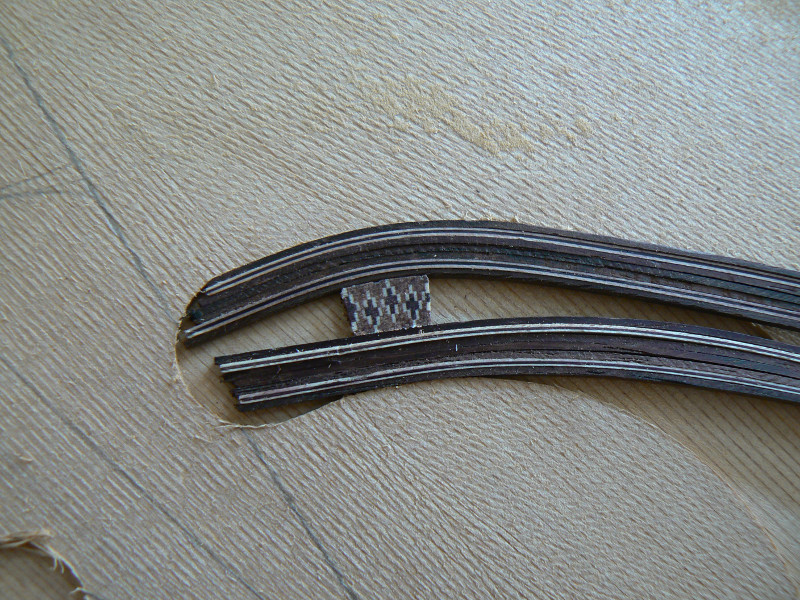 The last photo is the finished project taken from a flamenco guitar which is now at Casa Luthier in Barcelona. I have made a few other rosettes but have been using this one for many years.
 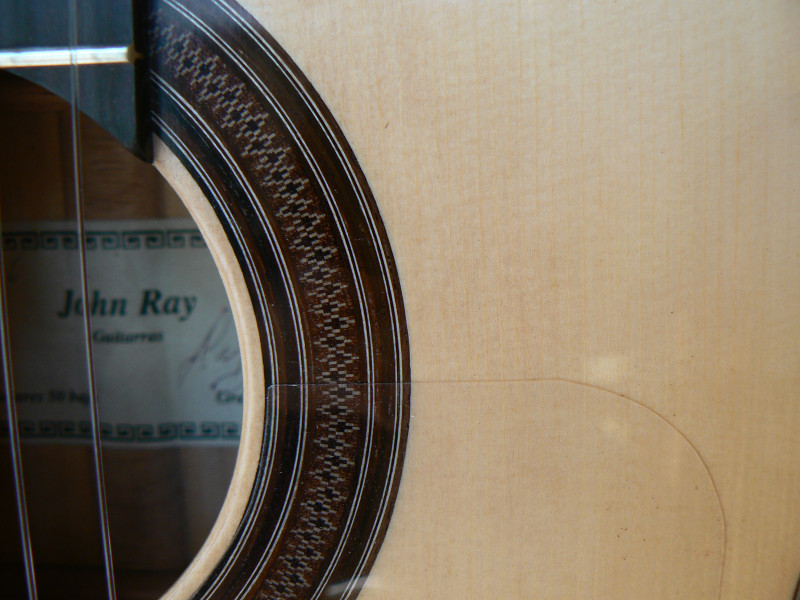 I don’t play around with new rosettes the way some makers do because I get enough variety with my historic reproductions.