Eusebio Rioja is a great scholar of the guitar and has published extensively on flamenco singers and guitarmakers especially those of Granada and Málaga. He has offered to share his work in progress about the Lorca family of guitarmakers in Málaga. Only in Spanish, sorry.
Eusebio Rioja es un gran academico de la guitarra y ha publicado considerables artículos y libros sobre temas como los guitarreros de Granada y Málaga y sobre cantaores de flamenco. Ha ofrecido compartir desinteresadamente este trabajo aún incompleto sobre la familia Lorca-guitarreros de Málaga.
Antonio de Lorca García.
Hijo de Asensio -carpintero- y de Florencia, nace en Cartagena (Murcia) en 1800, bautizándosele en la Parroquia de Santa María. Con 20 años de edad se asienta en Málaga, en cuya calle Carretería número 13 estaba empadronado desde 1830. En 1837, el inmueble pertenecía a Matías Mandly y pagaba Antonio de Lorca por el arrendamiento 100 Reales. A partir de 1850, lo encontramos en el número 60 de la misma calle, como domicilio propio y definitivo.
Se examinó de maestro guitarrero el día 28 de diciembre de 1828 en Málaga, fedatando el acto el escribano Joaquín Bourman y Vibar, quien lo retrataría como de estado casado, estatura mediana, color moreno, nariz regular, boca idem, ojos pardos, barba poblada y como de edad de treinta y un años.
Casado con Francisca Pino, enviudó joven no sin antes engendrar cinco hijos de este matrimonio: Dolores nacida en 1826 y fallecida soltera el diez de agosto de 1853, a causa de ataque cerebral crónico, María del Pilar nacida en 1829, Encarnación nacida en 1827, Antonio a quien después biografiaremos y Carolina nacida en 1835. El 12 de julio de 1860 contraería segundas nupcias con Dolores Eugenia Román, nacida en 1808, de la que no nos consta que tuviese descendencia. En el Padrón Municipal de ese año, sólo se registra su hijo Antonio en el domicilio. Antonio de Lorca García falleció en 1870.
Su reputación como guitarrero fue importante y desahogada su posición económica, por lo regular, encontramos siempre personas de servicio en su casa, así como una larga lista de oficiales en su taller. Algunos: José María Torrens, José Salido, Antonio Pomar y Salvador Castellón.
En 1829 es el guitarrero que mayor donativo ofrece para socorrer la catástrofe valenciana: cuatro Reales de Vellón, el doble que sus demás compañeros en el gremio. En 1852 tributa en concepto de cuota de la Contribución Industrial de Comercio 16 Reales y como Cuota de interés común y de cobranza: 186 Reales y 2 Maravedíes.
En 1848 es distinguido con medalla de plata de segunda clase por la Sociedad Económica de Amigos del País, por una guitarra de excelentes voces que presentaría en la exposición de aquel año, según consta en el acta de la citada entidad y según recoge Pascual Madoz en su célebre Diccionario.
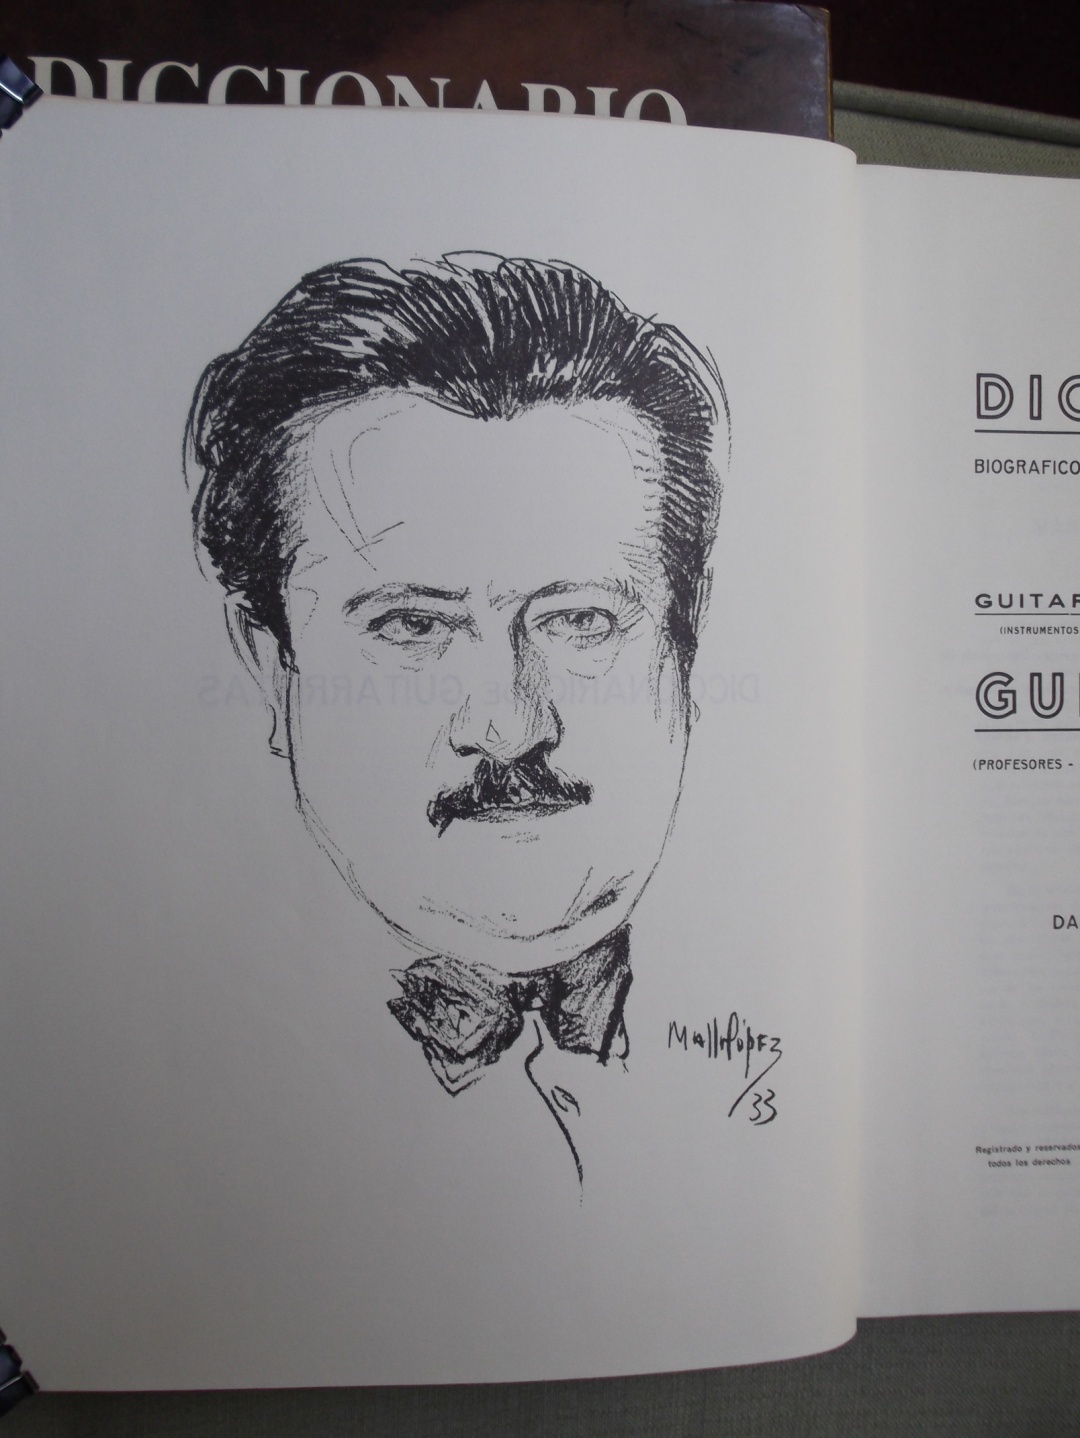
Por su parte, Domingo Prat también lo citó así en su Diccionario de Guitarristas:
En el año 1803 el constructor de guitarras malagueño Antonio Lorca fundó su taller en Málaga, y su hijo, Antonio Lorca Pino, siguió las mismas normas del padre, quien falleció casi centenario en el año 1870 (p. 376).
Como apreciamos, son varios los errores que vierte en este párrafo Domingo Prat. Antonio de Lorca García no era malagueño, nació en Cartagena, no pudo fundar su taller en 1803 ya que tenía entonces tres años de edad y por último, no pudo morir casi centenario en 1870, tenía setenta años. Sin duda, Prat no debió apuntar bien los datos. De cualquier manera, hemos visto etiquetas de guitarras Lorca de sus últimos años preferentemente, que dicen haberse fundado el taller en 1803. Está claro que el error no lo cometió sólo Domingo Prat.
Sea en el año que sea, con Antonio de Lorca García se inicia en Málaga una dinastía de guitarreros, que marcó con su hijo Antonio de Lorca Pino y con su nieto Antonio de Lorca Ramírez, toda la historia guitarrera malagueña del siglo XIX y que llegaría a través de Francisco Domínguez -oficial de Lorca Pino y de Lorca Ramírez- y el hijo de éste: José Domínguez, hasta finales del XX.
La guitarrería Lorca ha sido objeto de la dedicación de periodistas y literatos malagueños, así en el suplemento al número 2234, del 14 de marzo de1943 que el diario Sur ofrecía glosando la artesanía malagueña, existe un artículo titulado La familia malagueña de los Lorca, constructores de las más famosas guitarras. Está firmado con la inicial S., por su curiosidad, damos a continuación estos párrafos:
(…) Málaga cuenta realmente con una bella historia en la construcción de la guitarra, y aunque quizás sería exagerado por ahora compararla con Cremona y hacer parangón entre lo que fueron las familias de los Amati y Stradivarius para el violín con la familia Lorca para la guitarra, no hay que olvidar que apenas han pasado unos años que desapareció el último miembro de esta familia que se dedicaba a esta construcción, y sin embargo las guitarras que el viejo Lorca vendía en 125 pesetas se han llegado a pagar ya hasta 25.000.
Es Antonio de Lorca el viejo, el más famoso constructor de guitarras de Málaga y uno de los de más renombre de España. Su taller de constructor data del año 1803, siendo tres generaciones de esta familia las que se han dedicado por entero a dicho arte.
Su fama de constructor es realmente merecida, llegando su nombre y sus instrumentos a todas las partes del mundo. Si hubo alguien en Málaga anterior al viejo Lorca, no debió ser nada notable, pues no han quedado rastros del mismo. A mediado del siglo pasado vivió otro constructor, que se llamó Eladio Molina, y tenía su taller en la Plaza de la Merced.
(…) Dejó Lorca en Málaga algunos discípulos, que han sido célebres, como Antonio Amores, Manara y Carlos Sánchez; en la actualidad ha quedado Domínguez, tal vez el mejor de sus discípulos, y que ha logrado con su pericia ganar una fama que ha traspasado ya los límites de España. (…)
Cuatro días después, abunda el mismo medio en el tema con el artículo titulado Una guitarra de Antonio Lorca. Afortunadamente, esta vez yerra menos:
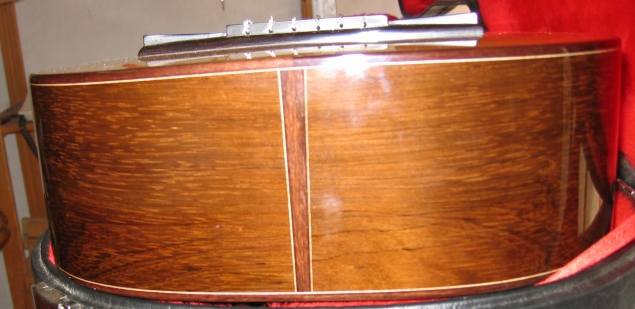
En nuestro suplemento al número del pasado domingo, dedicado a la artesanía malagueña, que tan favorable acogida ha tenido entre nuestros lectores, publicábamos, entre otros, un artículo sobre la familia malagueña de los Lorca, constructores de las famosas guitarras de esa marca, tan apreciadas por los inteligentes en la materia. Teníamos noticias de que entre las pocas obras de los Lorca que se conservan en Málaga se encontraba una de características singularísimas, quizás la mejor de todas las salidas del famoso taller. Premuras de tiempo nos impidieron localizarla oportunamente.- Hoy ofrecemos a nuestros lectores una fotografía del citado instrumento, propiedad de una conocida familia malagueña. Fue construido por Antonio Lorca el viejo trabajando en ella dos años. La tapa es de pino abeto alemán, los aros y fondo de palosanto; el diapasón y el clavijero de ébano; el mástil de cedro. Tapa y fondo están ornamentados con incrustaciones de nácar y plata delicadamente terminados como todas las labores del gran Antonio.
A su vez, Francisco Bejarano Robles: Paco Percheles publicaría otro artículo, ahora en Hoja del Lunes del cinco de abril del mismo año, con el título Guitarrerías:Noches pasadas, en un café apartado, cuyo nombre no hace al caso, donde solemos reunirnos alguna que otra vez, sin pretensiones de tertulia literaria, varios amigos aficionados a las artes y a las letras, se presentó un gitano viejo, magro, sucio y raído, después de acercarse y saludarnos cortésmente, solicitó consultarnos sobre “un cierto asunto”. Con los arrequives de rigor en los de su raza y con no poca lagotería, pues a las primeras de cambio hechó por delante, llamándonos a todos por nuestros nombres, que si acudía a nosotros era por constarle que éramos personas “mu leías y escribías” y unos perfectos “cabayeros,” incapaces de engañar a nadie, en su pintoresco lenguaje subrayado por una mímica expresiva nos expuso el motivo de su visita. En resúmen se trataba de que a sus oídos había llegado la noticia de que la guitarra de los Lorca, a quienes él, de “chavea,” había conocido en su taller de Carretería, las estaban comprando los ingleses o los americanos u “otros tíos de fuera con mucha tela,” pagando de cuatro a cinco mil duros.

Calle Carretería. Ca. 1940.
Colección Arenas.
Archivo Municipal de Málaga.
Y él -aquí bajaba la voz y aproximaba su rostro a nosotros estirando el cuello y con los ojos muy abiertos-, ¡tenía una guitarra de Lorca!… que podía ser “el apaño” de su familia. Y que constara que allí no había exageraciones de gitanos ni fantasía; que él la vió mercar a su padre “mismitico,” que aunque no fue “tocaor” de oficio, fue un “aficionao” de los que hicieron raya, y en el Altozano o en la calle de los Negros y, algunas veces, hasta en la Caleta, encantó a más de una reunión con el primor de sus manos y aquella joya de guitarra había sonado un sin fín de veces acompañando a los mejores “cantaores.” Un hijo suyo también había tocado “alguna cosilla,” pero el pobrecito, que era un asaura,” terminó por dejarla y luego, llena de polvo y abandonada rodó por los rincones de su vivienda hasta que él, por temor a que los nietecillos la rompieran, la “alzó” y conservaba como recuerdo, sin sospechar nunca el tesoro que tenía. Por último, nos pedía que la viésemos; que él nos la traería allí mismo o a donde le dijésemos; pues no era cosa de llevarnos al corralón en que habitaba y, además, que él no quería “soliviantá” a su familia hasta no estar seguro de lo que barruntaba.
En fín, la guitarra fue vista y examinada por varios de la reunión y por otras personas entendidas, artesanos y artistas, y resultó que era una de tantas guitarras y que, aunque fuera de Lorca, no había que esperar que sacara de apuros a la familia del ya desilusionado gitano.
Esto dió pié a que se hablase en la reunión de guitarras, de guitarreros y de guitarristas, y hasta hubo alguno que tomó la cosa muy en serio, pues a su propia casa fue algún que otro especializado propietario de una vieja guitarra y sostenía que debía salirse al paso de tales fantasías, ya que ellas hacían concebir ilusiones y falsas esperanzas y hasta quien sabe si podría ser causa de cualquier timo.
Francisco Bejarano Robles: Paco Percheles.
Efectivamente, decía, Lorca el viejo y sus descendientes fueron grandes guitarreros, verdaderos artífices, como lo fue también Antonio Torres de Almería; pero no todas las guitarras que salieron de sus talleres respectivos fueron obras perfectas, ni sencillamente buenas. Su fama la conquistaron con cierto número de verdaderas obras maestras, cuyas condiciones no tuvieron todos los instrumentos que llevan su nombre. Es más, respecto a Torres, cuyo verdadero acierto fue el implantar la innovación de las cajas grandes y de curvas muy pronunciadas, hay que decir que su mejor época fue la de Almería, donde trabajó sin prisa, condición indispensable para toda obra bien hecha; pero una vez establecido en Sevilla, y como fuese muy amigo de Tárrega, éste le proporcionó tantos encargos, que ya muchas de las guitarras que salieron de su taller no fueron de sus manos y, en general, los instrumentos de esta época son inferiores a los de la primera, aunque sean buenos.
Además, las roturas de las guitarras determinan que, al arreglarlas o componerlas, pierden sus condiciones. No hay compostura más delicada ni más expuesta al fracaso. Por esta causa, muchas guitarras que fueron excelentes dejaron de serlo; porque lo que hace valer a un instrumento es que, siendo bueno desde su origen, la caja se mantenga tal como fue hecha.
El célebre guitarrista Arcas tuvo una guitarra de Torres, a la que él llamaba su “leona,” que aseguran fue vendida en muy alto precio. También la de Tárrega fue adquirida por un americano en cinco o seis mil duros; pero en estos casos entra por mucho el recuerdo del artista, la sombra inmortal de aquellas manos privilegiadas que supieron arrancar a instrumentos perfectos tantos raudales de armónica belleza. De esto a que cualquier guitarra de Lorca valga 25.000 pts. como ambicionaba el gitano de marras, hay un abismo.
El escritor Sebastián Souvirón plasmaría igualmente las guitarras del taller de los Lorca en un cuadro literario que titula Juan Breva, que en Gloria esté, aludiendo a una visita del rey Alfonso XII a Málaga:Alfonso XII llega a esta estampa de una ciudad, señora y fina, que sabe cantar y sentir. Y el rey de romance camino del Ventorrillo de Domingo, jarana que le pide el cuerpo, se va a oir al Breva. Detrás de su coche cuatro duques del séquito están poniendo prólogo al romance. Y como es del uso en estos casos, repiqueteos de tacones y vino y guitarras finas del taller de los Lorca, y los ojos de Alfonso XII abrazando el talle de las mozas. Y Juan Breva que se arranca por malagueñas en una sentida ingénua copla que, después, el tiempo hará profecía:
Cuatro sabios se juntaban
en la agonía de un rey:
“toos” los cuatro se espantaban
porque al mandar Dios su ley
ciencia y dinero se acaban…

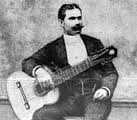
Juan Breva y Paco Lucena.
Museo del Flamenco. Peña Juan Breva. Málaga.
Conocemos una guitarra construida por Antonio de Lorca García en 1847, la hemos fichado en La Guitarra Malagueña. Cinco siglos de Historia y en Las guitarras tampoco vienen de París (p. 52). He aquí la ficha:
Guitarra nº 3.
Antonio de Lorca García, Málaga, 1847.
Etiqueta:
Por Antonio de Lorca
en Málaga
año de 1847.
Materiales:
Tapa: pino-abeto.
Aros y fondo: palosanto.
Mástil: cedro.
Diapasón: ébano.
Sobrecabeza: palosanto.
Puente: ébano.
Medidas:
Longitud total 937 mm.
Longitud de la caja 440
Tiro de cuerdas 644
Ancho del lóbulo superior 207
Cintura 164
Ancho del lóbulo inferior 277
Ancho de los aros en el zoque 87
Ancho de los aros en la culata 97
Diámetro de la boca 79
De la boca a la culata 336
Longitud del clavijero 180
Ancho del diapasón en la cejuela 48
Ancho del diapasón en el zoque 89
Grueso del clavijero 55
Grueso superior del mástil 15
Grueso inferior del mástil 24
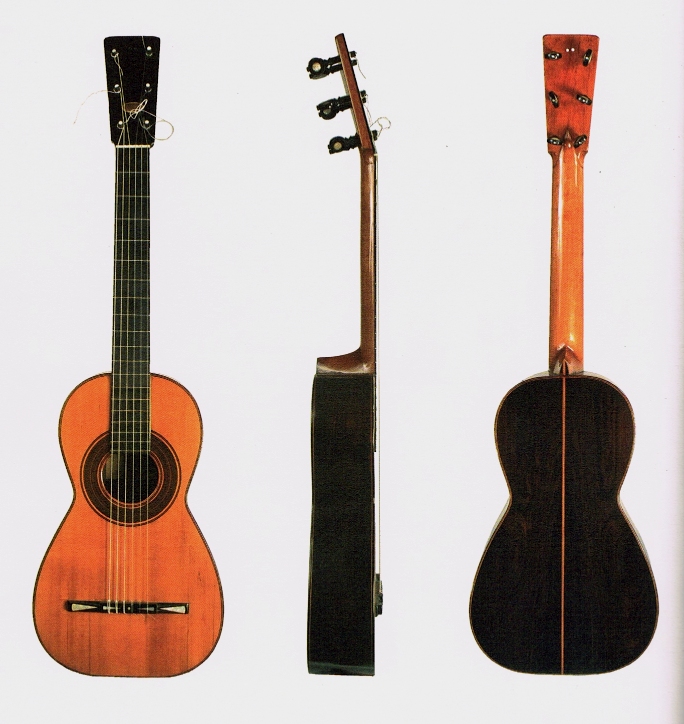
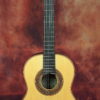
Antonio de Lorca García. Málaga, 1847.
José Luis Romanillos y Mariam Harris Winsper también la ficharon en Exposición de Guitarras Antiguas Españolas (p. 31). El libro La Guitarra Española (p. 145) ofrece la siguiente descripción de este instrumento, que perteneció a la antigua colección de Angel Luis Cañete:
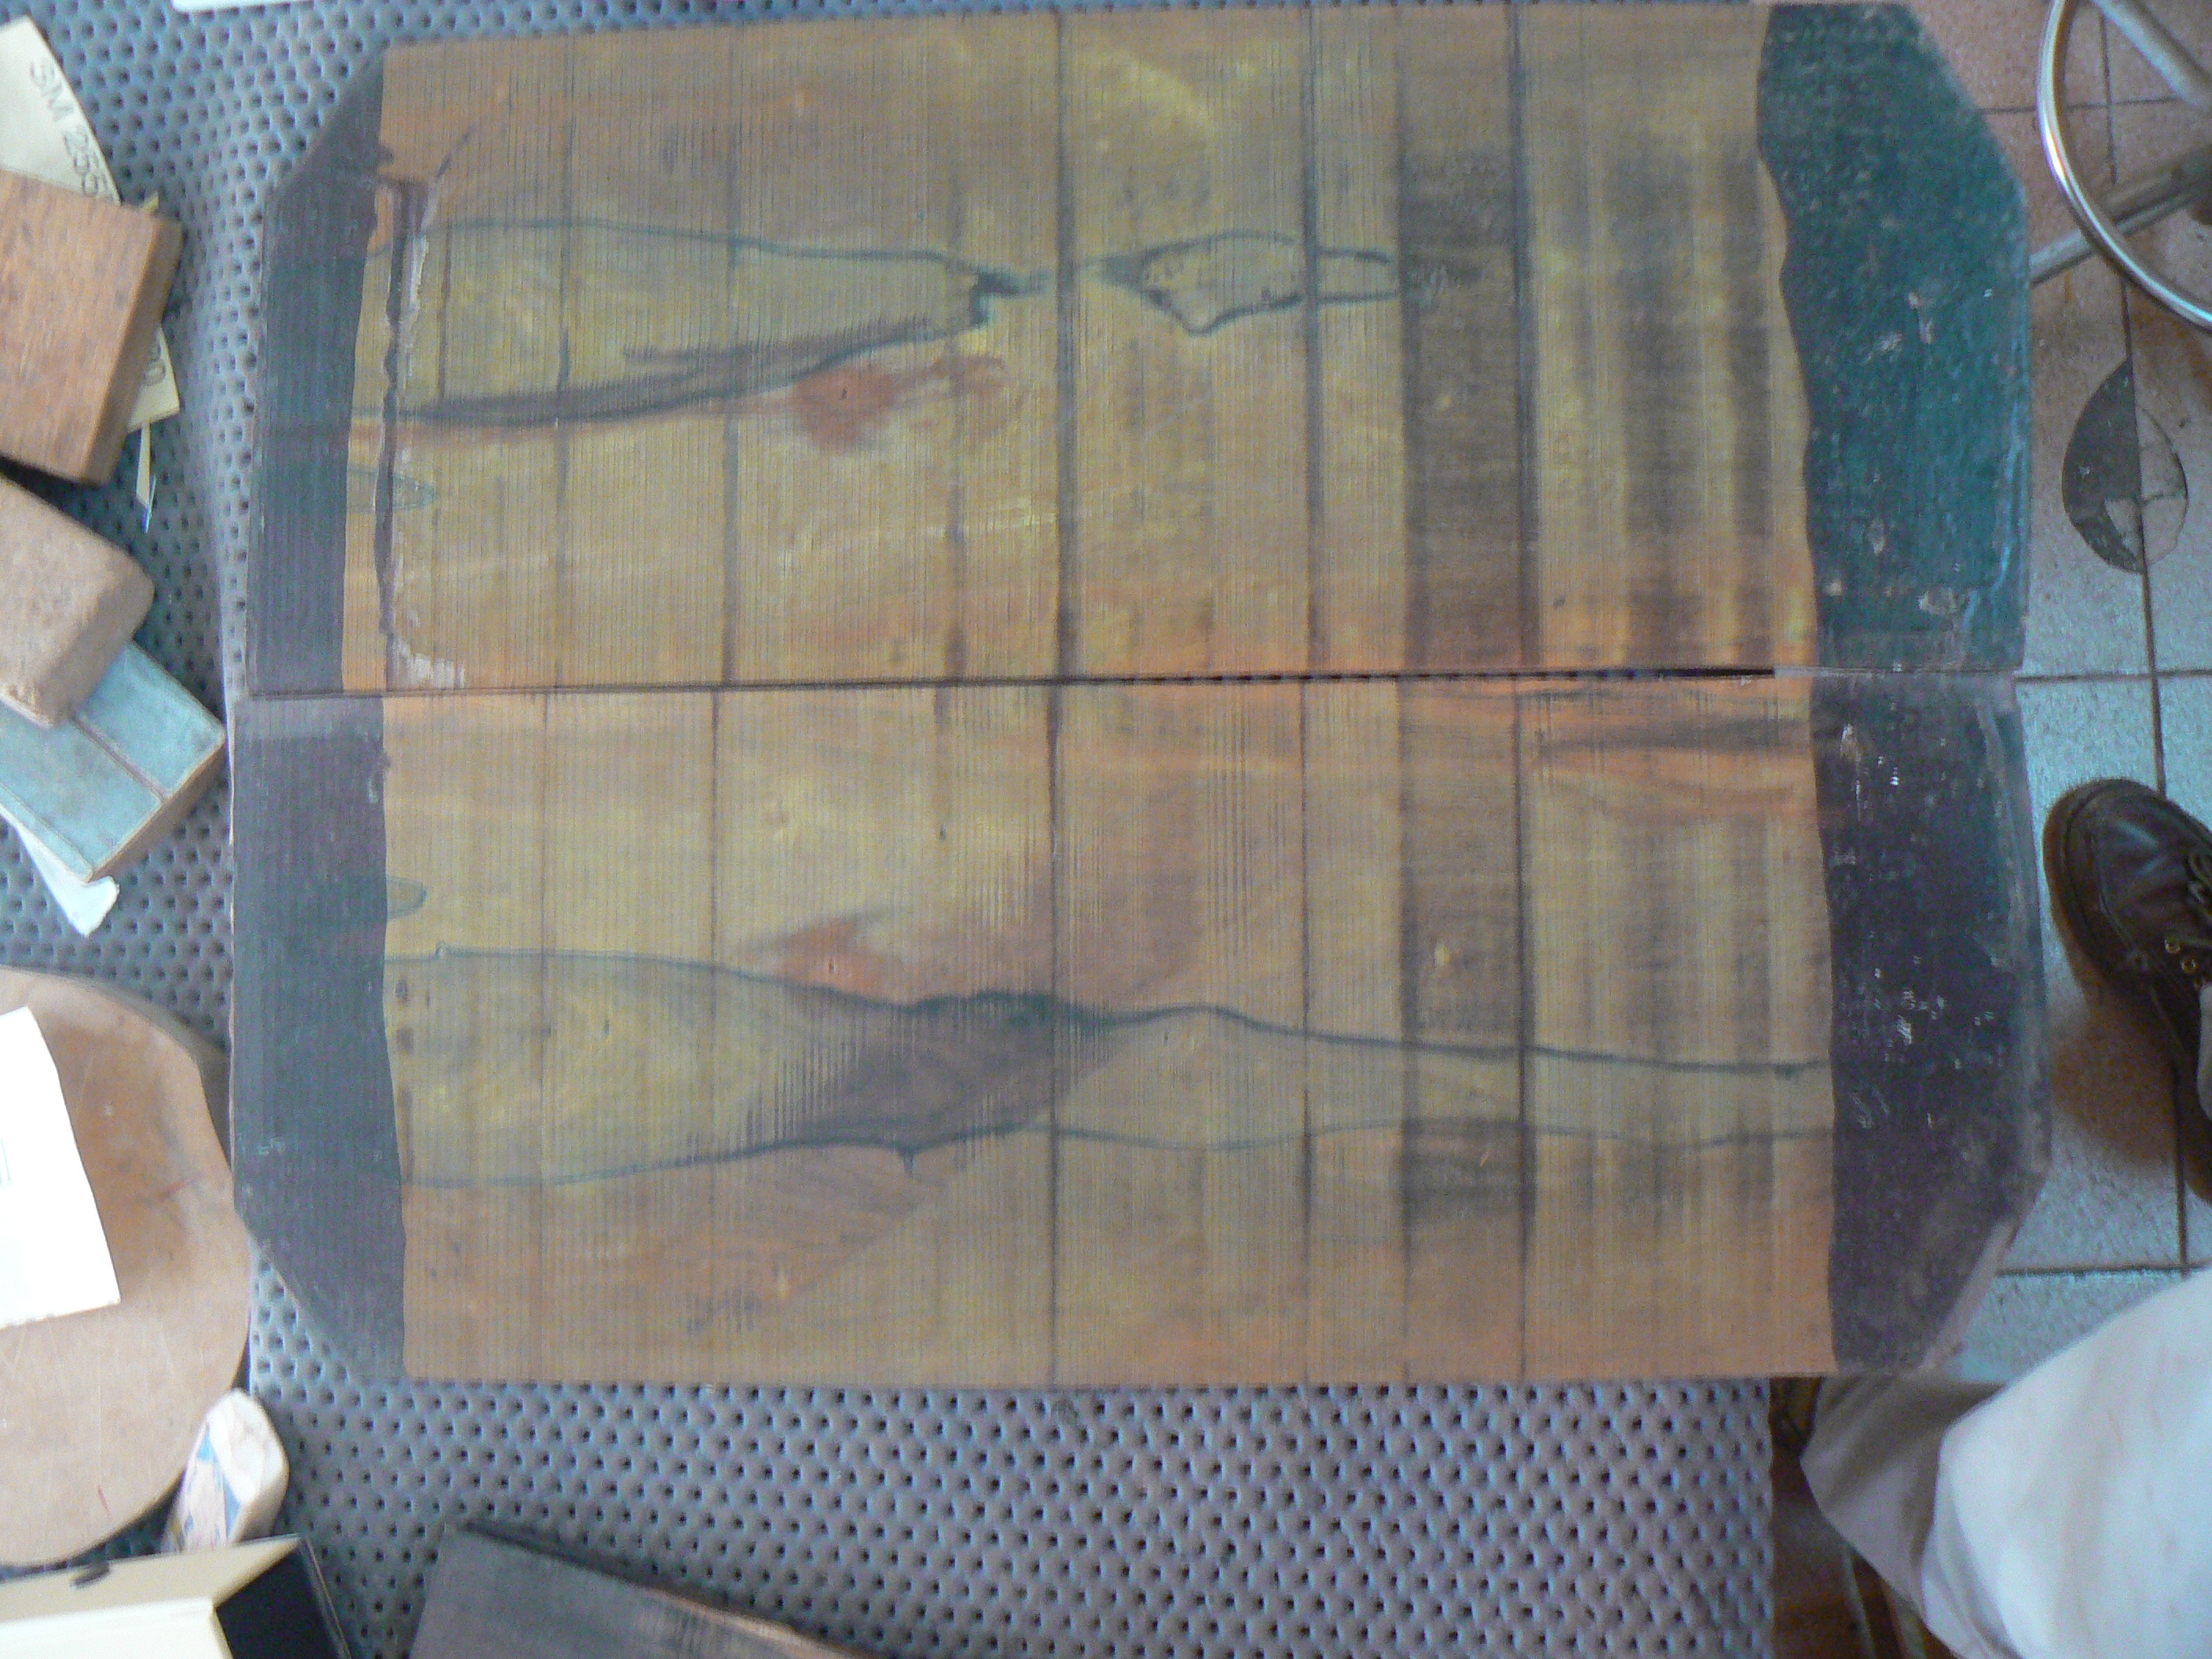
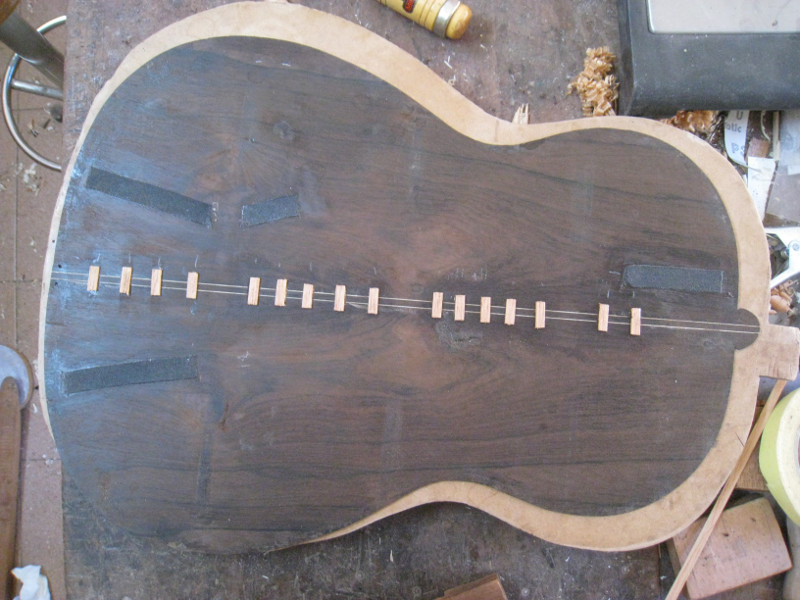
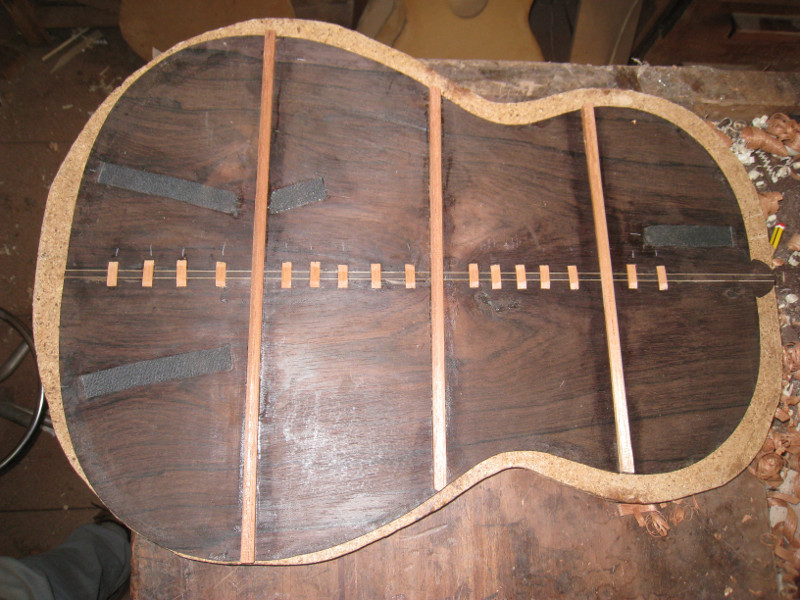
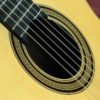
La tapa es de abeto (Picea); aros y fondo de palosanto (Dalbergia); el puente y la chapa de la cabeza son también de palosanto; el mástil es de cedro (Cedrela) con el diapasón en ébano (Diospyros). En la tapa encontramos la boca reforzada por dos barras armónicas paralelas y dos bloques de madera en los costados, perpendiculares a las barras. En el lóbulo mayor, un “abanico” con una vareta que sigue el centro de la tapa, de arriba a abajo, y otras dos a cada lado, las dos exteriores haciendo ángulo con las adyacentes. En el fondo, dos barras transversales, una en el lóbulo mayor y otra un poco más abajo de la cintura. Los refuerzos de las barras son con peones en forma de horqueta, los contraaros son de tira continua.
Esta guitarra ha sido recientemente restaurada por José Angel Chacón, de Málaga. Antonio de Lorca García (Cartagena 1798-Málaga 1870), fue el fundador de toda una estirpe de guitarreros malagueños de apellido Lorca (Antonio de Lorca Pino, su hijo, y Antonio de Lorca Ramírez, su nieto) que, junto a los guitarreros formados en sus talleres, constituyen lo más importante de la guitarrería malagueña del siglo XIX.
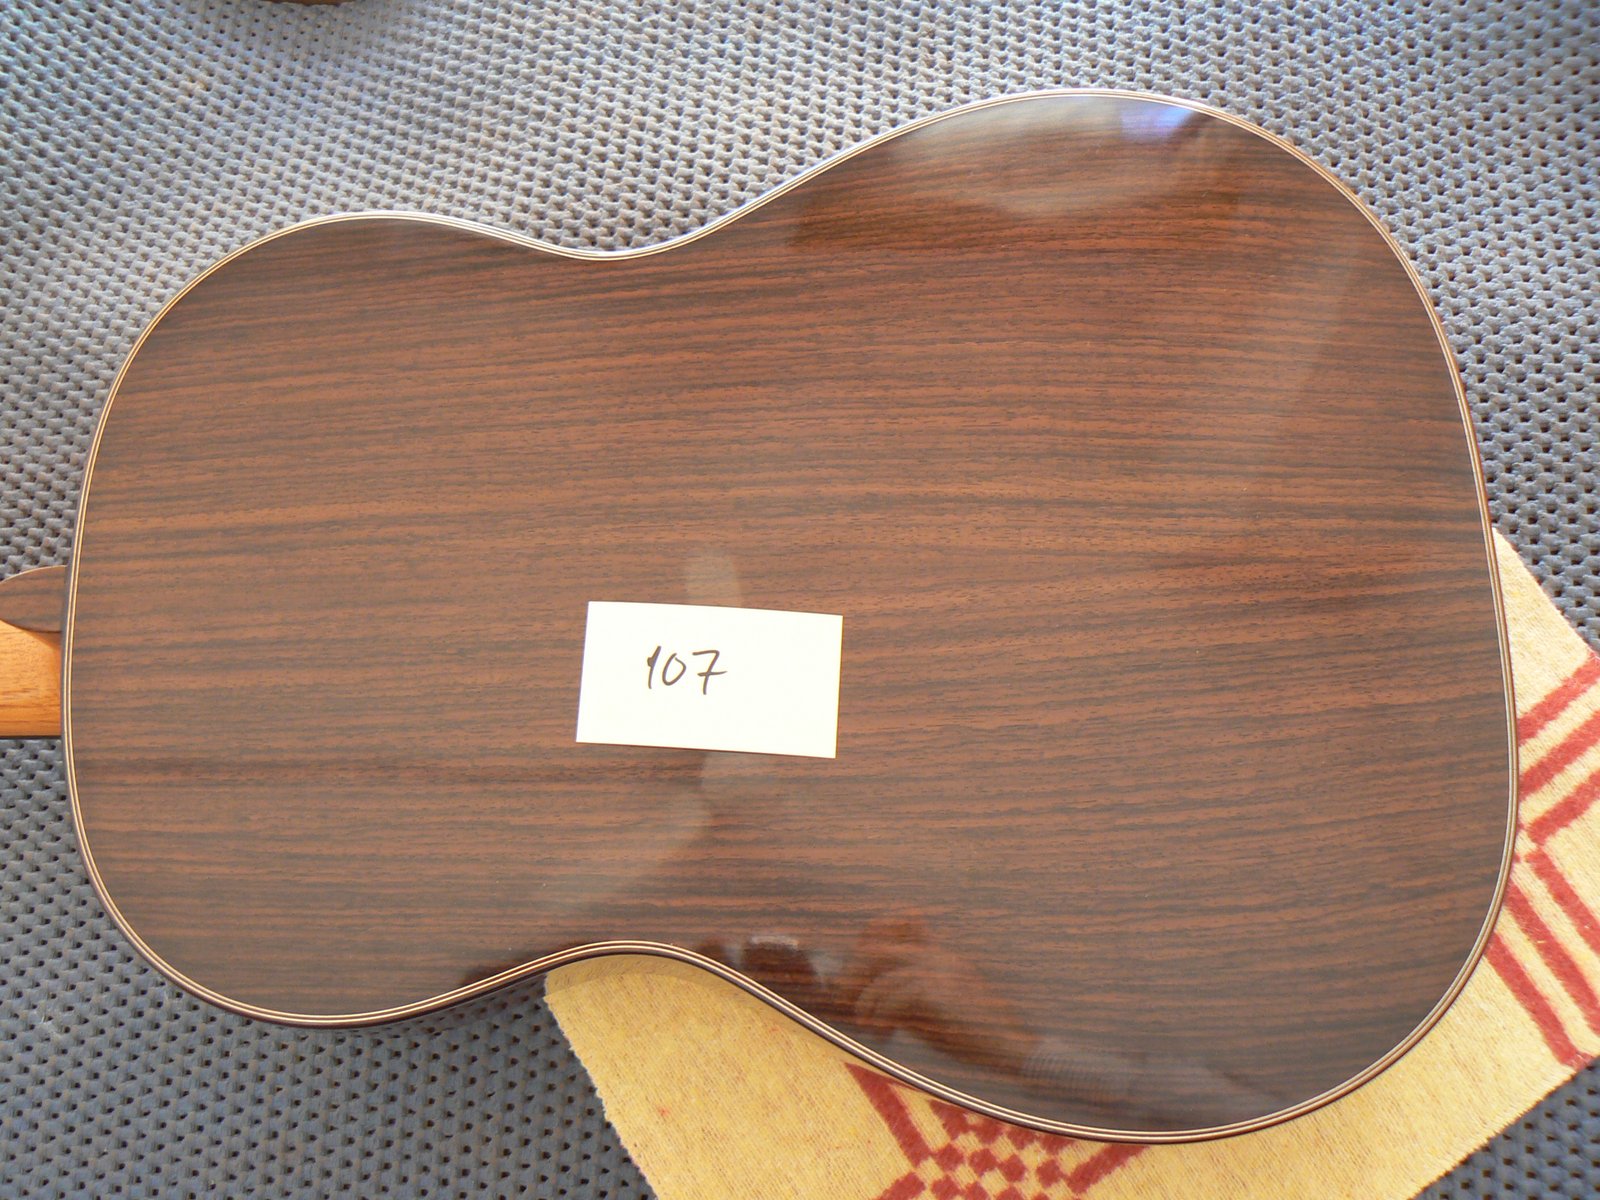
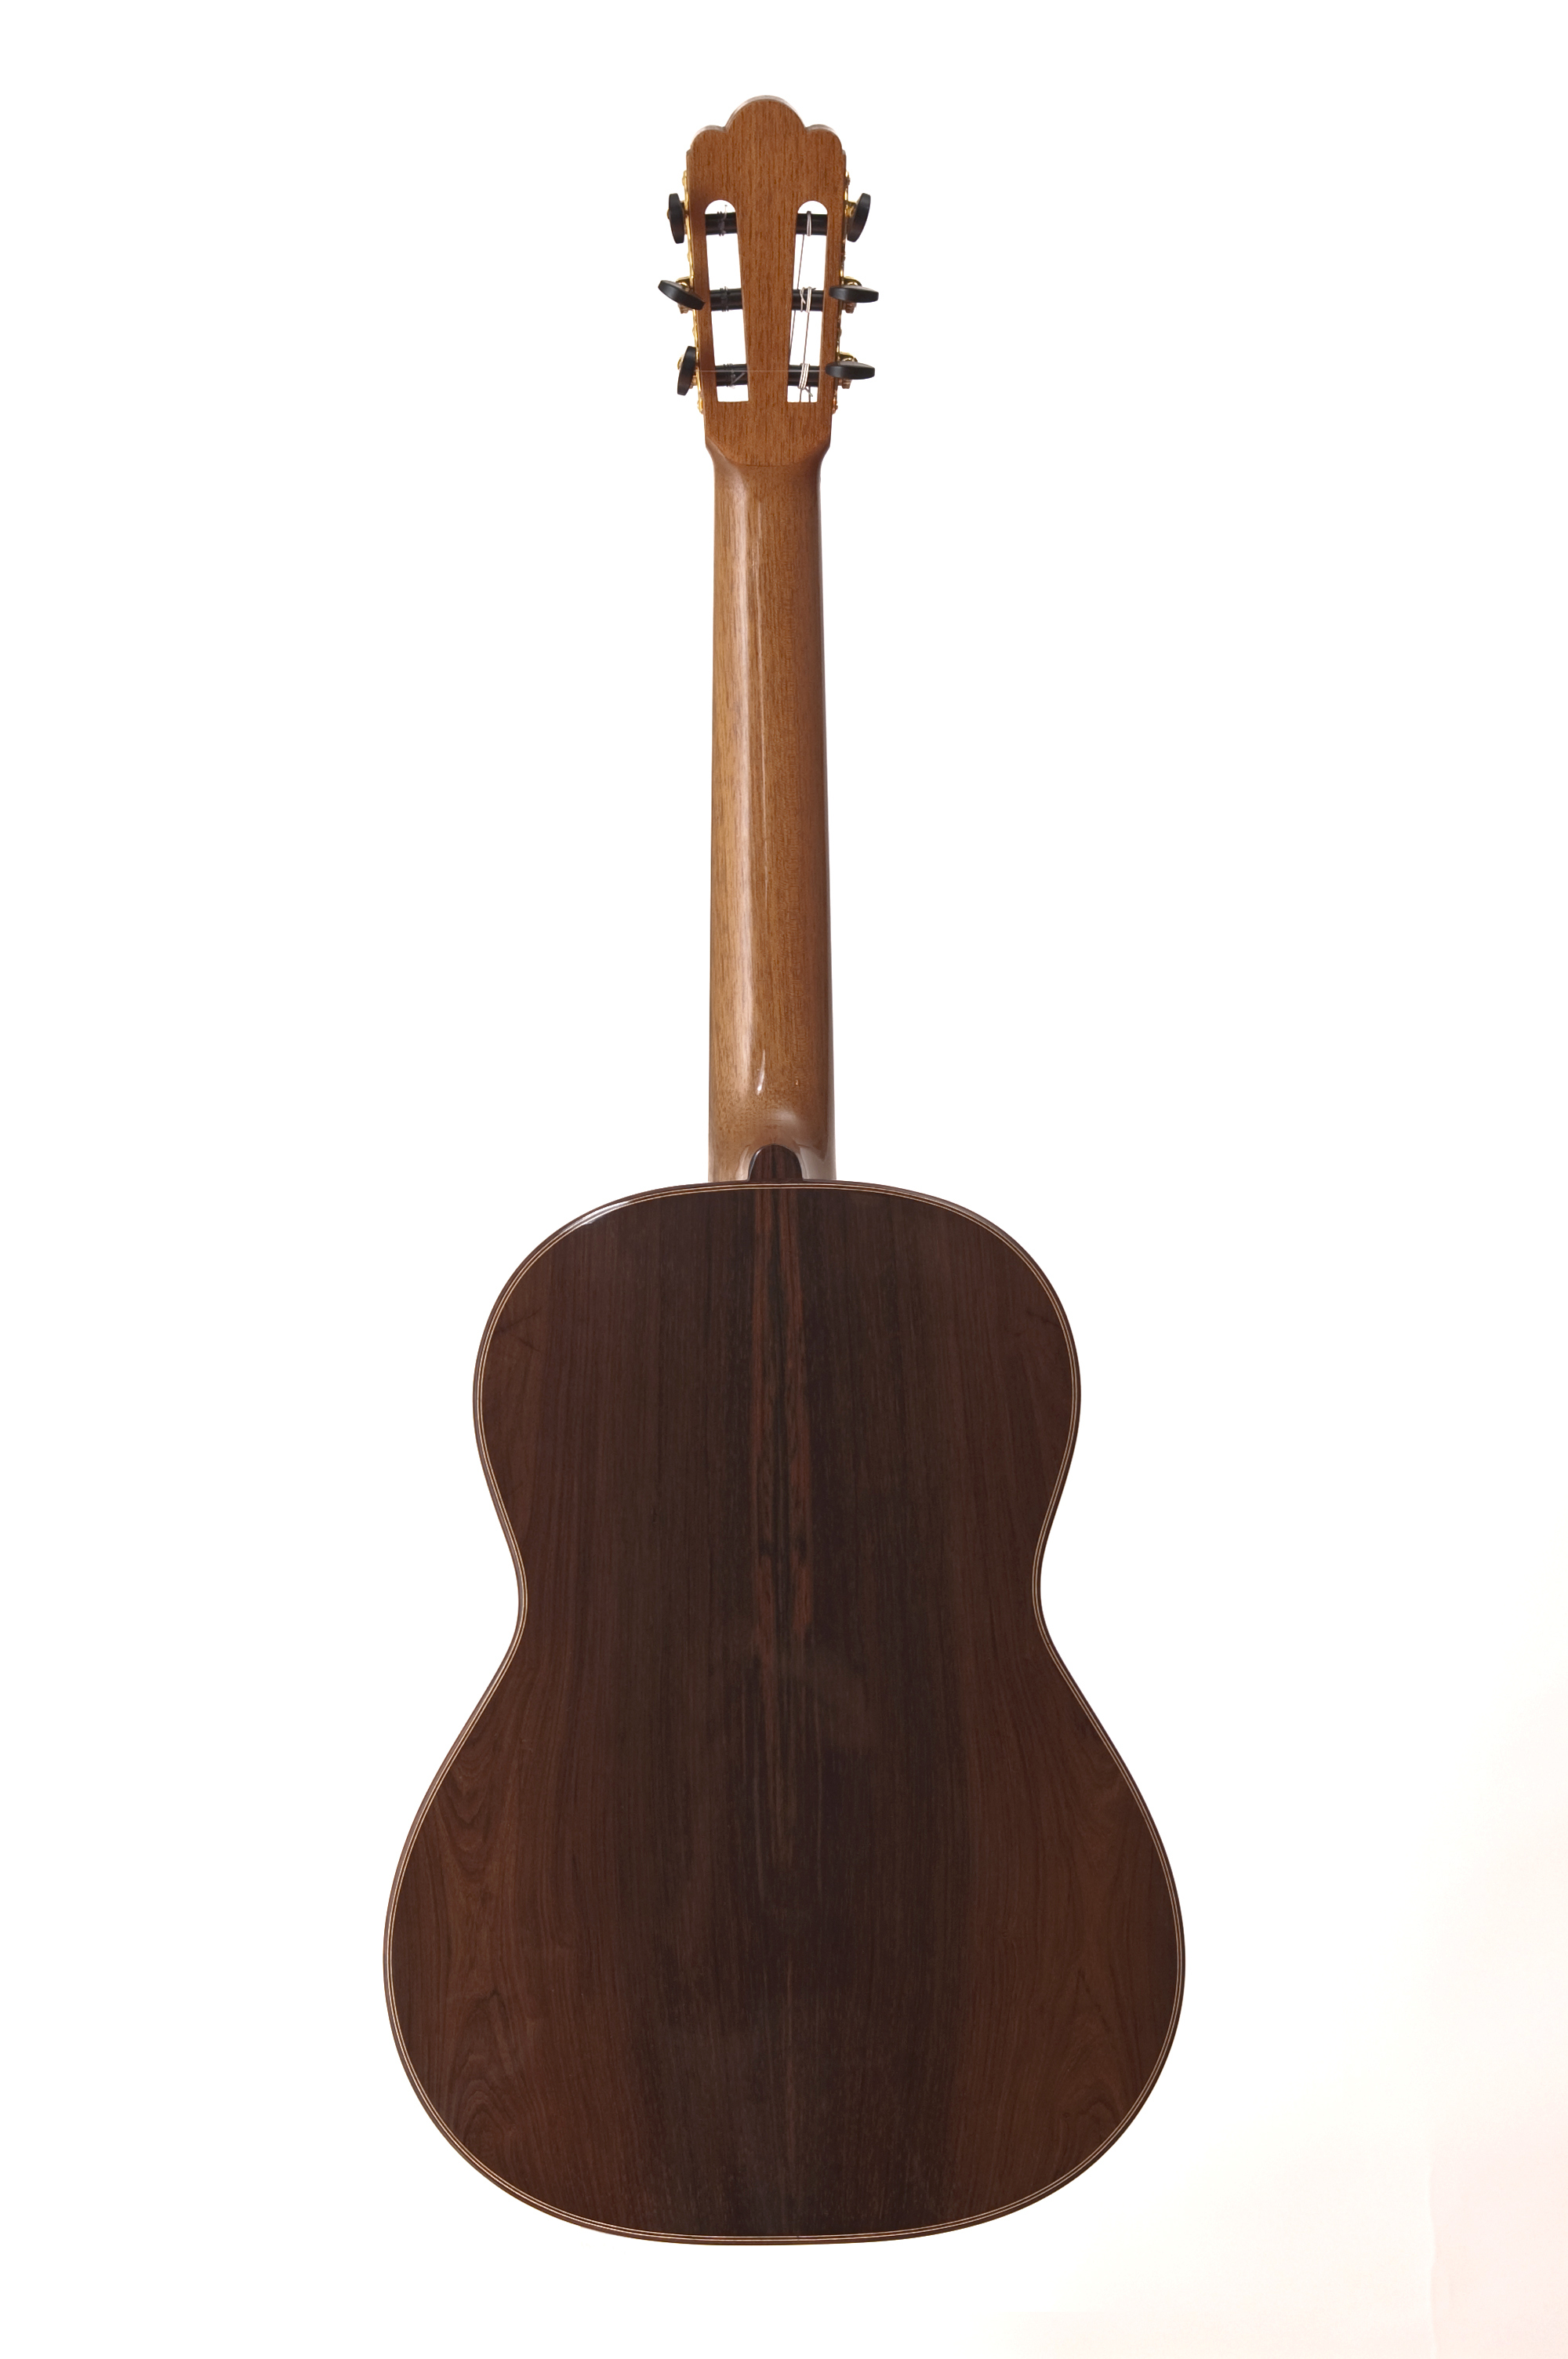
Este instrumento fue restaurado y sirvió de modelo al guitarrero granadino John Ray para elaborar el tipo de instrumentos Antonio de Lorca que construye como réplicas. En su web https://johnguitar.com apunta Ray una detallada y admirable descripción técnica de este histórico instrumento, catalizador de los trabajos más cualificados que realizara Antonio de Lorca García.
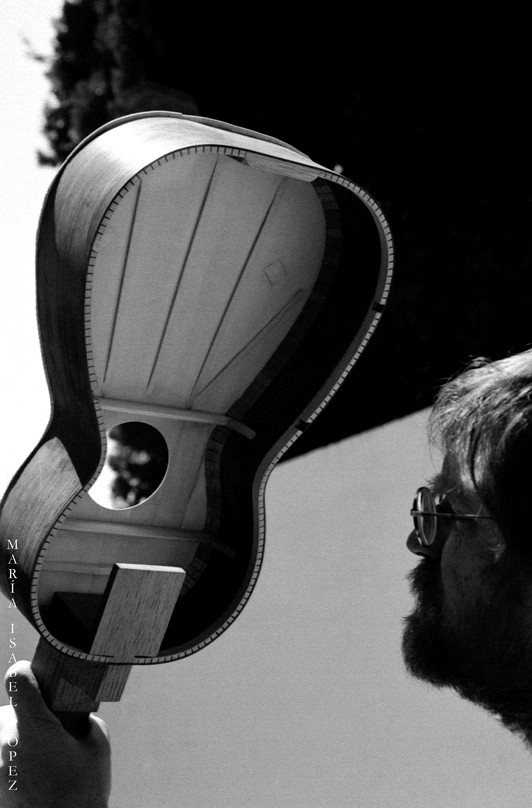
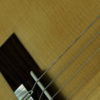
John Ray con la guitarra Antonio de Lorca, 1847.
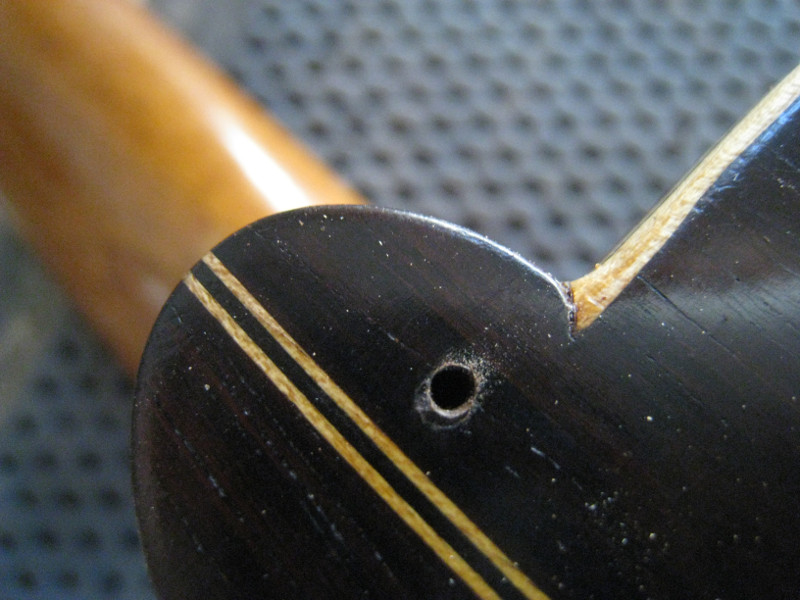
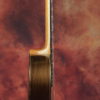
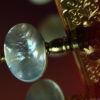
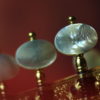
Cuña del mástil para inserción en la cabeza.
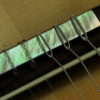
Zoque con cenefa.
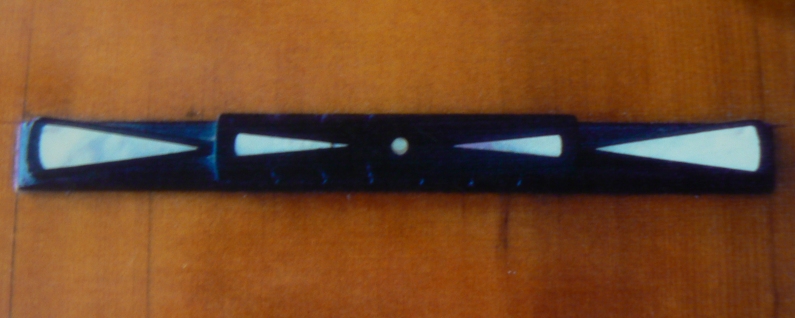
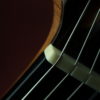
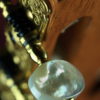
Puente con incrustaciones de nácar.
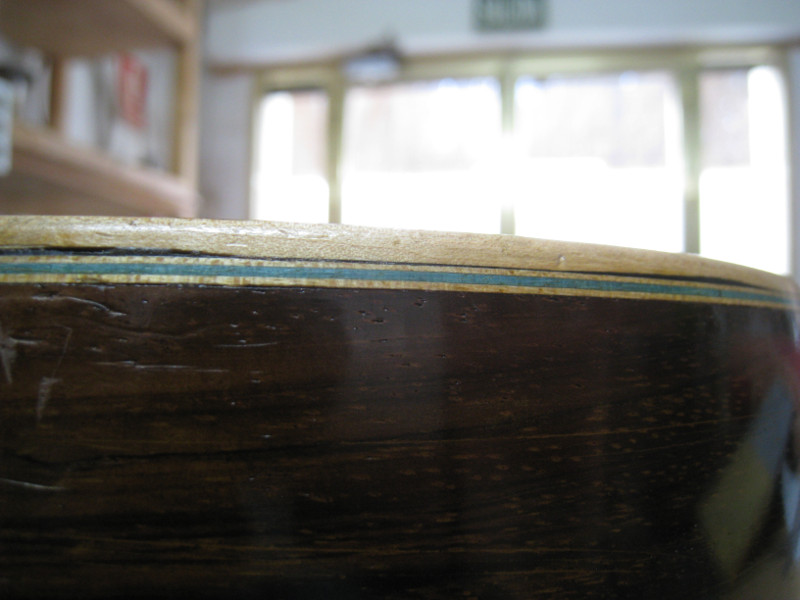
Culata con fileteado.

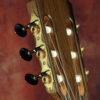
Réplica construida por John Ray. Granada, 2003.

Detalle.
En Exposición de Guitarras Antiguas Españolas (p. 31), José Luis Romanillos y Mariam Harris Winspear fichan otras dos guitarras construidas por Antonio de Lorca García, una en 1842 y otra en 1849, instrumentos que pertenecieron a la colección del guitarrista Narciso Yepes. Esta es la ficha de la construida en 1849:
Guitarra nº 19.
Antonio de Lorca, 1849, Málaga.
Materiales:
Tapa: pino.
Aros y fondo: Nogal.
Mástil: cedro.
Características de construcción:
Dos barras armónicas.
Dos barras transversales.
Tres varetas en el abanico.
Refuerzos de la tapa: continuo.
Refuerzos del fondo/aros: continuo.
Refuerzos de barras: horquetas.
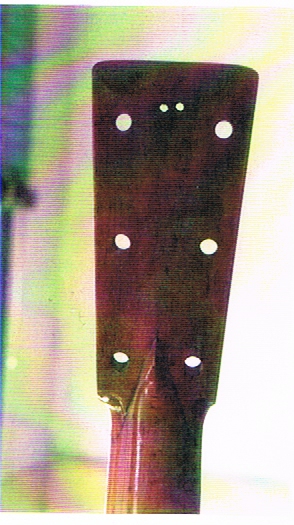
Pala de clavijas.
Dimensiones:
Lóbulo menor 204,
Cintura 160,
Lóbulo grande 275,
Longitud de la caja 652,
Anchura del aro 86/92/96,
Anchura del mango en la cejuela 50,
Anchura del mango en el zoque 60,
Desde la boca hasta parte superior de la caja 103,
Longitud de la pala 169,
Anchura superior de la pala 79,
Diámetro de la boca 79,
Desde el puente hasta final de la caja 9.

Guitarra Antonio de Lorca con tornavoz.
Como hemos anticipado, Antonio de Lorca Pino, hijo de Antonio de Lorca García, continuó la profesión paterna en su mismo taller. Redactaremos después su biografía.
Antonio de Lorca Pino.
Hijo del guitarrero Antonio de Lorca García y de Francisca Pino, nació en Málaga en 1836. Y continuamos haciendo salvedad del posible error en las fechas.
Seguro discípulo de su padre, en 1865 aparece empadronado en el número 10 de calle Nuño Gómez y en dicho domicilio, su esposa: Manuela Ramírez, nacida en 1837, en Churriana (Málaga) y también Francisco Travesedo, natural de Escobar de Carriero, con 57 años, 34 de residencia en Málaga y jornalero de profesión, con su esposa Dolores Prieto, de 56 años y nacida en Málaga, su hijo Antonio, de 22 años y guitarrero y sus hijas Dolores y Francisca, con 29 y 18 años respectivamente. Todos nacidos en Málaga.
Cinco años después, en 1970 habitaban en el número 60 de calle Torrijos, el que había sido domicilio de su padre fallecido ya, domicilio igualmente de su hija Amalia, con meses de edad. En efecto, la niña había nacido el 30 de abril del año anterior y se le bautizó en Los Mártires el nueve de mayo.
Y otros cinco años después, en 1875 figura empadronado en su casa el tercer Antonio, además de la citada Amalia. Antonio tenía entonces tres años, es decir, que había nacido en 1872.
En 1885, había enviudado y su familia se componía de tres hijas: Amalia, Antonia, nacida en 1873 y Adelaida, en1877. Ignoramos por qué no aparece en el domicilio su hijo Antonio, posiblemente estuviese estudiando interno. Antonio de Lorca Pino pagaba de Contribución la cantidad de 100 pts.
Su taller de calle Carretería 60 sería mencionado por numerosas guías de la ciudad de Málaga, guías comerciales publicadas en aquellos años.
Domingo Prat le dedicó en su Diccionario de Guitarristas este bello párrafo que reproducimos:
Lorca Pino, dentro del ambiente de guitarras, guitarreros y guitarristas en que vivía, supo hacer de su taller el punto de reunión obligado, como sala de estudio y crítica, a la que acudían Torres, Arcas, Parga y otros muchos. Puede, pues decirse, que entre instrumentos y música saltaban virutas desgranando preludios multicolores. Lorca Pino fue distinguido ejecutante, discípulo de Parga, quien en el año 1893 le dedicó su Op. 10, capricho sobre las “murcianas,” primera rapsodia de concierto del ilustre gallego. La guitarra de Juan Parga que se ve en las portadas de sus obras, la construyó Lorca, su discípulo guitarrista en 1889 (p. 376).
Juan Parga con la guitarra construida por
Antonio de Lorca Pino, descrita por Domingo Prat en Diccionario de Guitarristas.
De esta manera describe Domingo Prat la guitarra:
Parga, como Napoleón Coste, Jiménez Manjón y otros, se sirvió de instrumento más dilatado que el ordinario: la guitarra que usó en su última década que es la que vemos en la portada de las obras editadas por López y Griffo y que hoy se encuentra en poder del que suscribe:
Domingo Prat.
consta de nueve cuerdas, las dos graves no interesan al diapasón; posee tornavoz; éste sostenido con “alma;” los aros son de dos piezas y el fondo de tres, siendo similar a muchas del constructor Pernas, maestro de Torres. El diapasón consta de 19 casilleros totales, alargándola en la prima hasta el 24, en forma fragmentada estas cinco restantes divisiones. Incrustada en la pala tiene una chapa de metal de plata, en la que destaca una lira dentro de un círculo oval, leyéndose: “Al eminente guitarrista D. Juan Parga. 9 Juinio 1889. Málaga”. Los filetes que la adornan y a la vez sirven de refuerzo no destacan en finura, siendo de gusto dudoso los adornos de la boca y puente. Convence más su sonoridad que su belleza de continente. Fué construída en el número 60 de la calle Torrijos, de la capital de Málaga, por Antonio de Lorca, penúltimo constructor de la dinastía de este apellido (pp. 237-238).
No dudamos de la veracidad del relato de Prat, son muestras elocuentes de la actividad del taller de Antonio de Lorca Pino, donde encontramos en el mismo tiempo a tres guitarreros que trabajaban a sus órdenes: Francisco Muñiz, Vicente Salido y Francisco Molina. Sería aprendiz suyo además Francisco Domínguez, antes de ser oficial de su hijo Antonio de Lorca Ramírez.
Antonio de Lorca Pino falleció el 18 de febrero de 1909, habiendo cumplido la hermosa tarea de tomar la tradición guitarrera malagueña de su padre y entregarla a su hijo y a su discípulo Francisco Domínguez.
Conocemos una guitarra construida por Antonio de Lorca Pino en 1871, que hemos fichado en La guitarra malagueña. Cinco siglos de historia y en Las guitarras tampoco vienen de París (p. 52). También fue fichada por José Luis Romanillos en Exposición de guitarras antiguas españolas (p. 31).
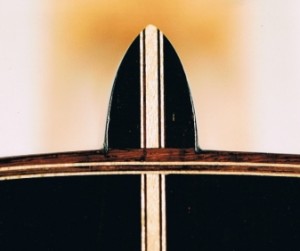
Se trata de un ejemplar de diseño y construcción anacrónico para su época, con bellísima estética que hace pensar que se tratara de un especial encargo. La plantilla es reducida y de formas inspiradas -o reproducidas- en las guitarras de la primera mitad del siglo XIX. La boquilla, el puente y las cenefas presentan una ornamentación profusa y elegante y posee voluta en la cabeza. El varetaje armónico se compone de cinco varetas: las tres centrales casi en vertical y las dos exteriores más abiertas hacia ambos lados y tangentes en la parte superior a las inmediatas. La tapa es de pino abeto; los aros, el fondo y la sobrecabeza son de palosanto; el mástil de cedro y el diapasón de ébano, así como la puente.
Existe otra guitarra de Antonio de Lorca Pino construida en 1880, que fue fichada igualmente por nosotros y por José Luis Romanillos en los libros citados. Ésta presenta una plantilla de corte moderno, inspirada en las de Antonio de Torres y posee una ornamentación en la boquilla y el puente elegante y profusa.
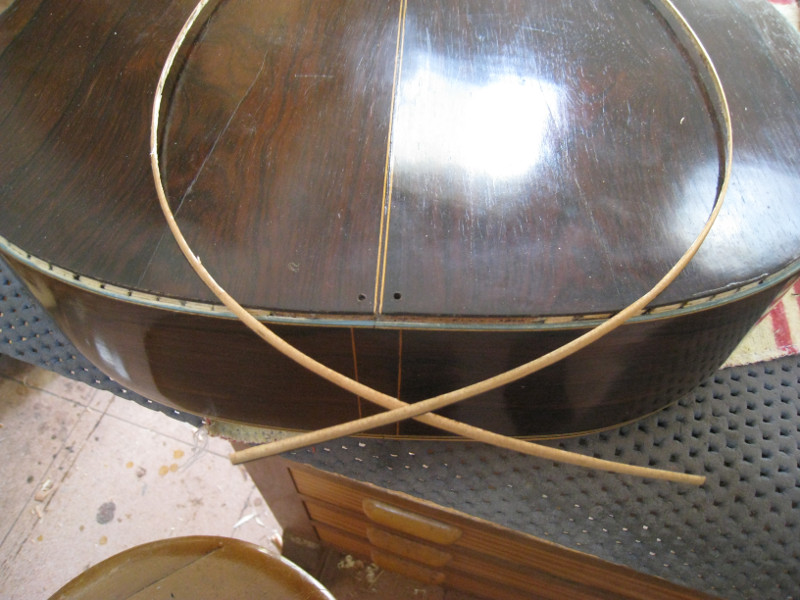
La tapa es de pino abeto, el fondo y los aros son de palosanto, el mástil de cedro y el diapasón de ébano. El fondo está construido con cuatro piezas en forma de cuña, con las zonas más estrechas en la parte superior.
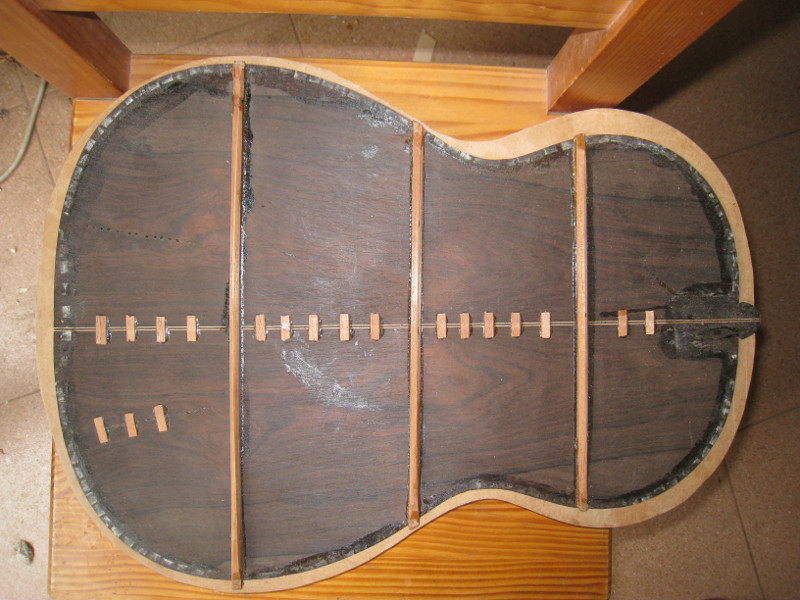
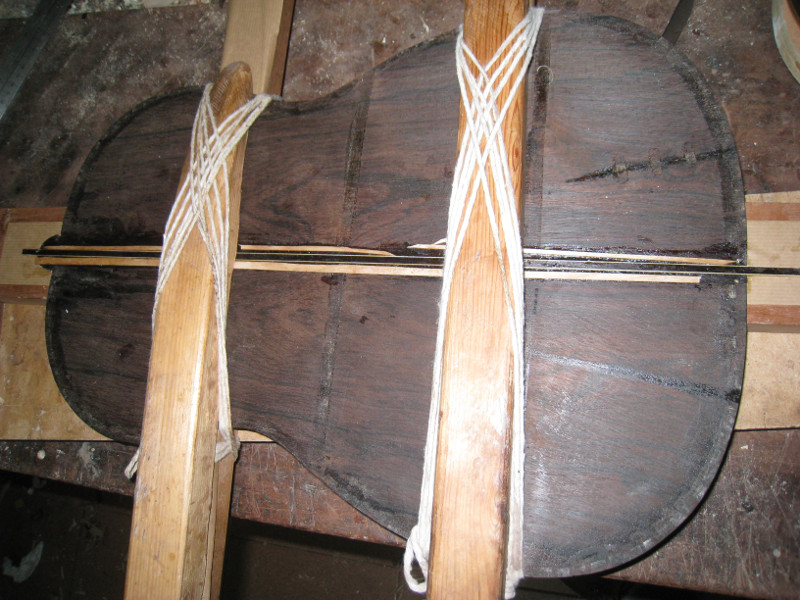
La tapa contiene en su interior un refuerzo de zoque de forma oval, cuatro varetas de refuerzo a ambos lados de la boca -dos a cada lado- y siete varetas armónicas: las cinco centrales casi en vertical y las dos exteriores abiertas y tangentes en su parte superior a las dos más próximas. El fondo posee en su interior un complicado sistema de tres barras horizontales y tres refuerzos en abanico, que aumentan la resistencia en las uniones de las distintas piezas de madera, que forman el fondo.
Este ejemplar supone un avance decidido hacia los conceptos modernos de construcción, respecto a la guitarra de 1871 y ambos instrumentos han pertenecido a la colección de Angel Luis Cañete.
Antonio de Lorca Ramírez.
Hijo del guitarrero Antonio de Lorca Pino y de Amalia Ramírez, nace en 1875 y se le bautiza en la Parroquia de Los Mártires. El 24 de octubre de 1912 contrajo matrimonio con Amelia Fernández, cuya descendencia interrumpe definitivamente la tradición guitarrera familiar.
De la existencia de su taller en 1929, da fe la guía de Málaga de aquel año, que lo sitúa en la calle Torrijos números 65 y 67 y con nombre equivocado: Antonio Lorca del Río. A título de curiosidad, apuntaremos también que aparece el mismo taller con el nombre de Antonio Lorca Ramírez en la guía de 1932, cuando ya había fallecido su propietario.
Domingo Prat dijo de él cuando biografió a su padre, Antonio de Lorca Pino:
… sucediéndole su hijo Antonio Lorca Ramírez, quien por el desgaste natural de tantos “Antonio Lorcas” fue el último de esta dinastía de guitarreros fundada en 1803 y fenecida en mayo de 1929, fecha en que falleció, sin sucesión constructora, Antonio Lorca Ramírez (pág. 377).

Su taller funcionó a modo de pequeña industria artesanal, fabricando numerosos instrumentos de precio reducido y de mediana calidad, destinados a satisfacer pedidos de revendedores que a veces llegaban incluso de América. Por otro lado, las guitarras de esmero y precio eran construidas bajo los sistemas tradicionales, por el maestro y sus oficiales más distinguidos. Uno de ellos, quien continuó realmente la tradición guitarrera de los Lorca, fue Francisco Domínguez.

 There has been some considerable turmoil about CITES especially among the guitar-makers as we have had to jump through quite a few hoops in order to legally export rosewood guitars. However, for the clients it really doesn’t make much of a difference. Of course I am talking about those woods in appendix II, not Brazillian. There are a few countries which apparently require an import permit as well as the export permit (we take care of the latter) but I have yet to come accross any of those. No permit required at all from one EU country to another and you can travel anywhere with your instrument after you get it home thanks to the personal effects exemption. You will really only be affected if you wish to sell your guitar overseas someday and then you will be applying for permits.