
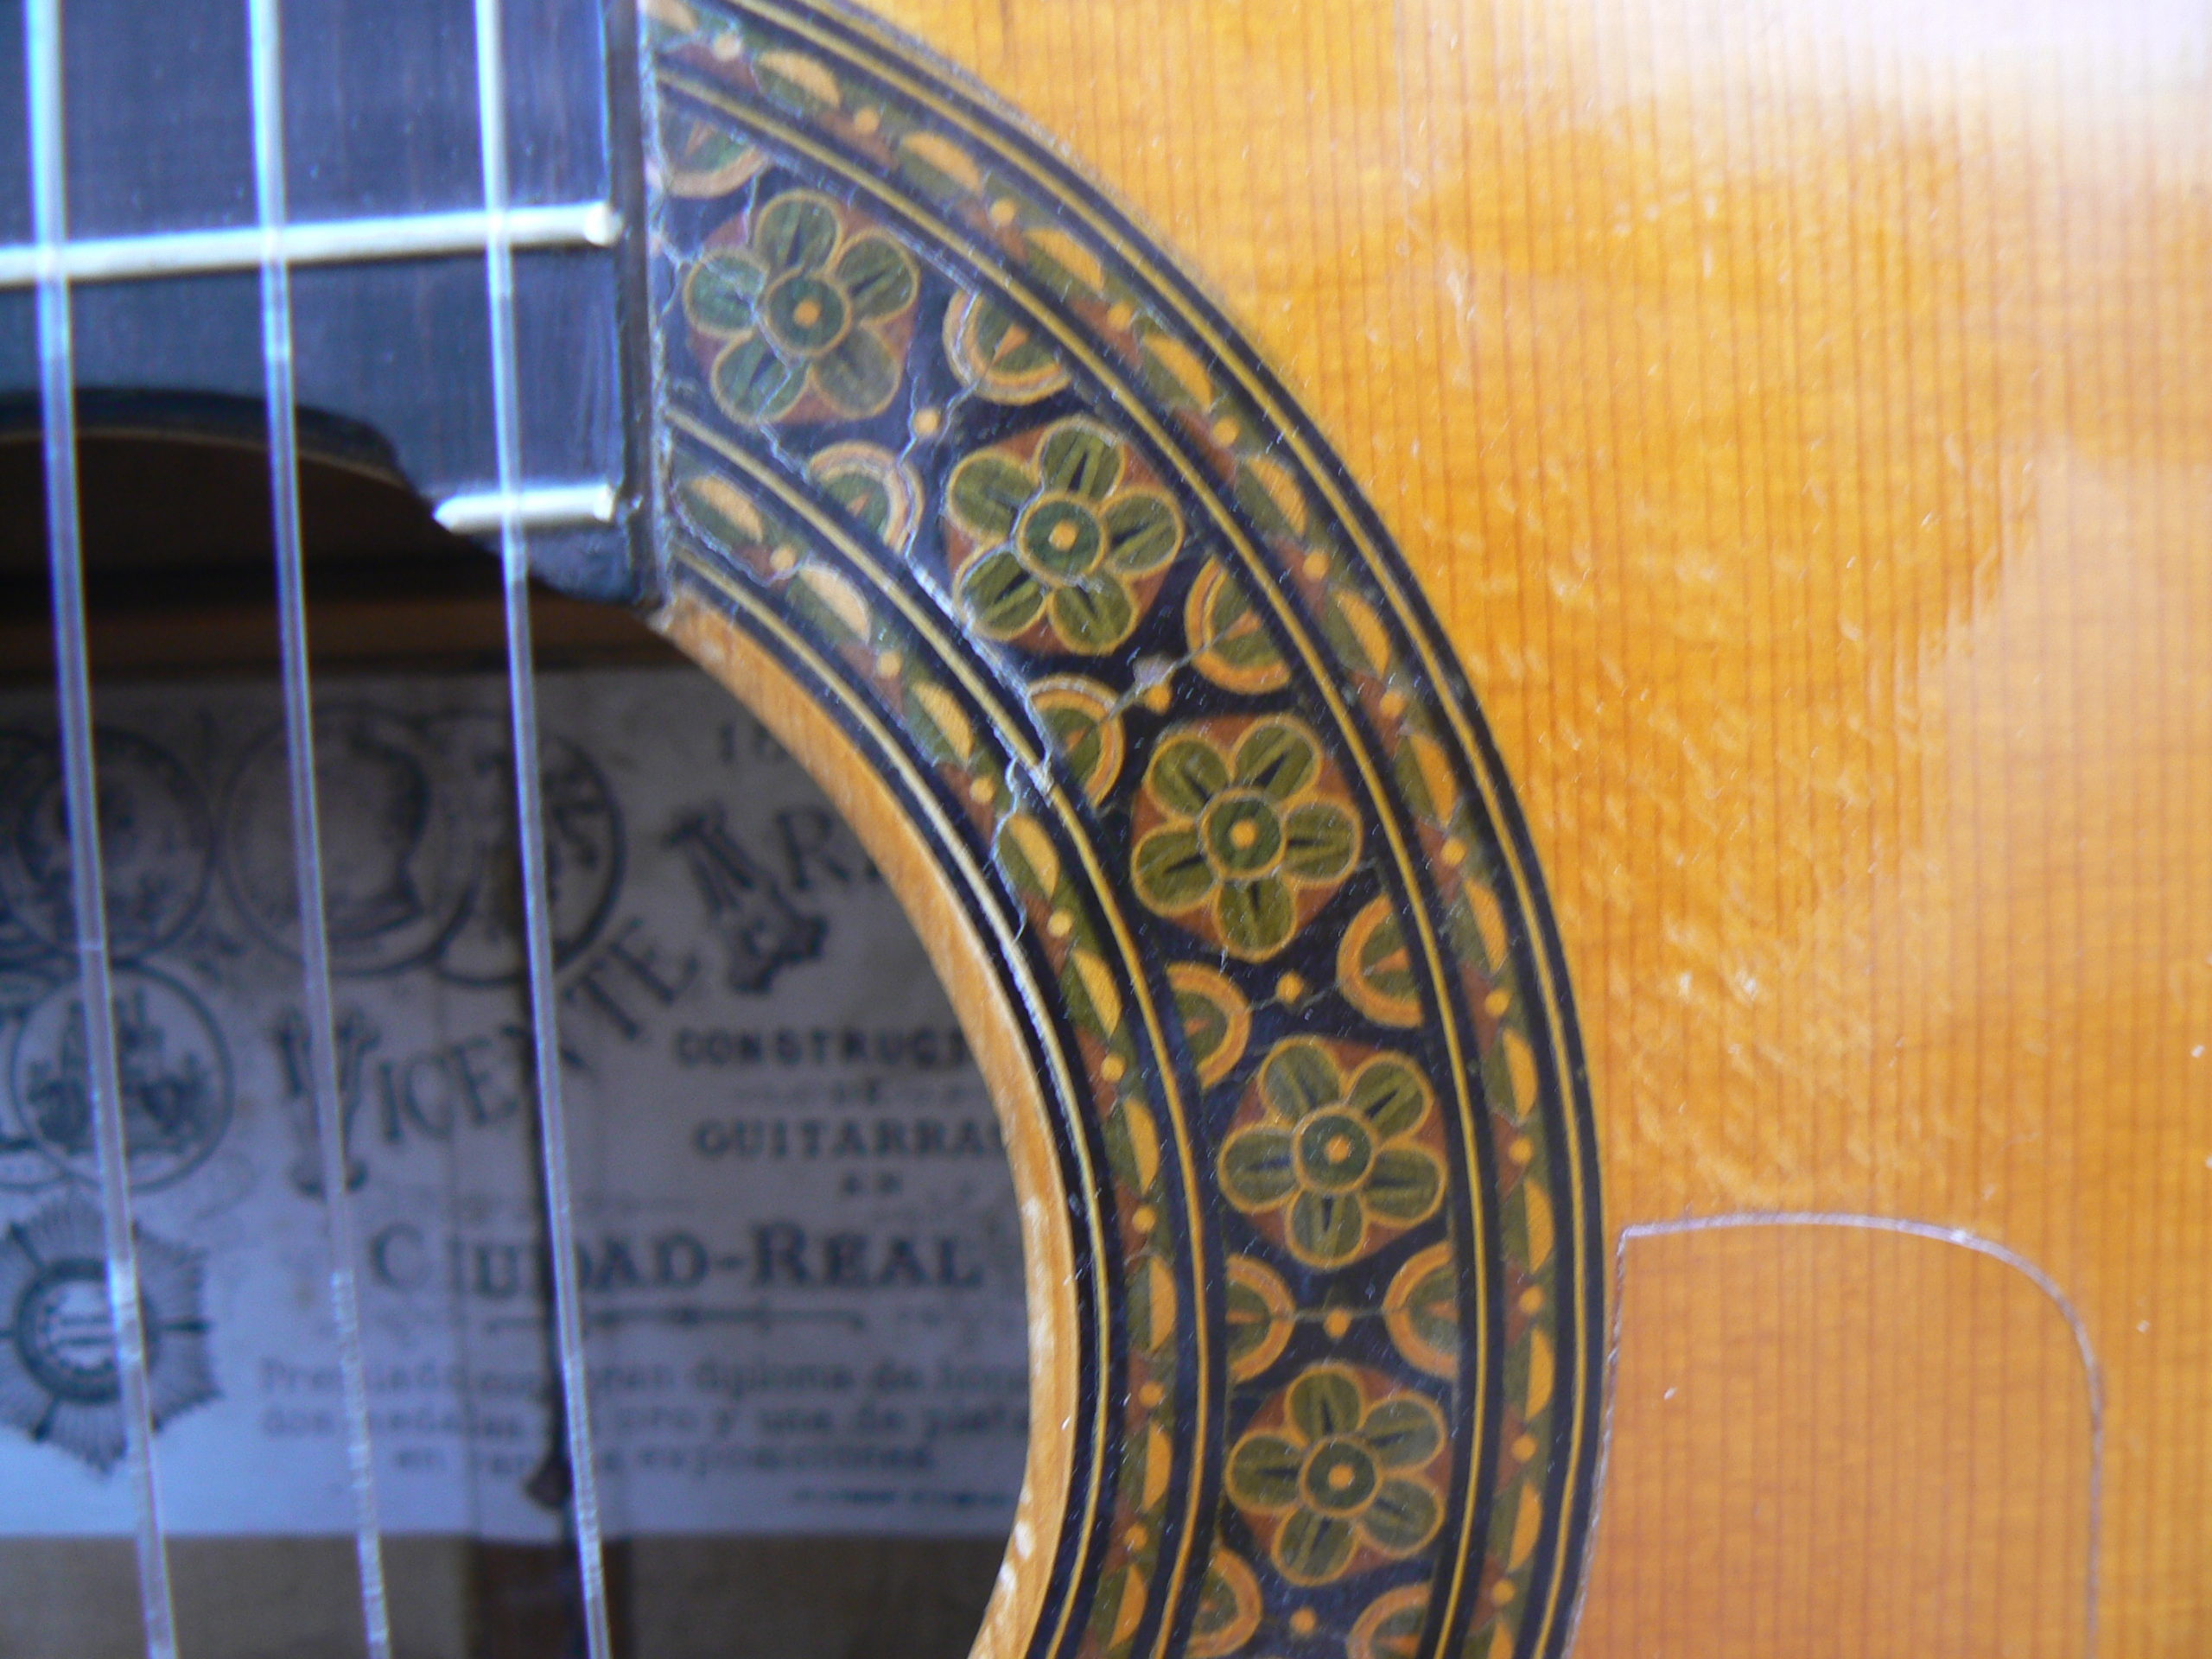
 I love old guitars and I have really enjoyed discovering how they made some amazing rosettes. However, I hope no one ever asks me to make a copy of this one. I really don’t know if I would be able to figure this one out.
https://www.youtube.com/watch?v=L0gJsHJAYHA
Category Archives: Vicente Arias 1900
Restoration photos III
A friend wanted to hear more about Vicente Arias and I realized that I never finished telling the story of its restoration. Carrying on from where I left off:
From looking inside the un-opened guitar, I had assumed that the hidden linings would be the same as the visible ones: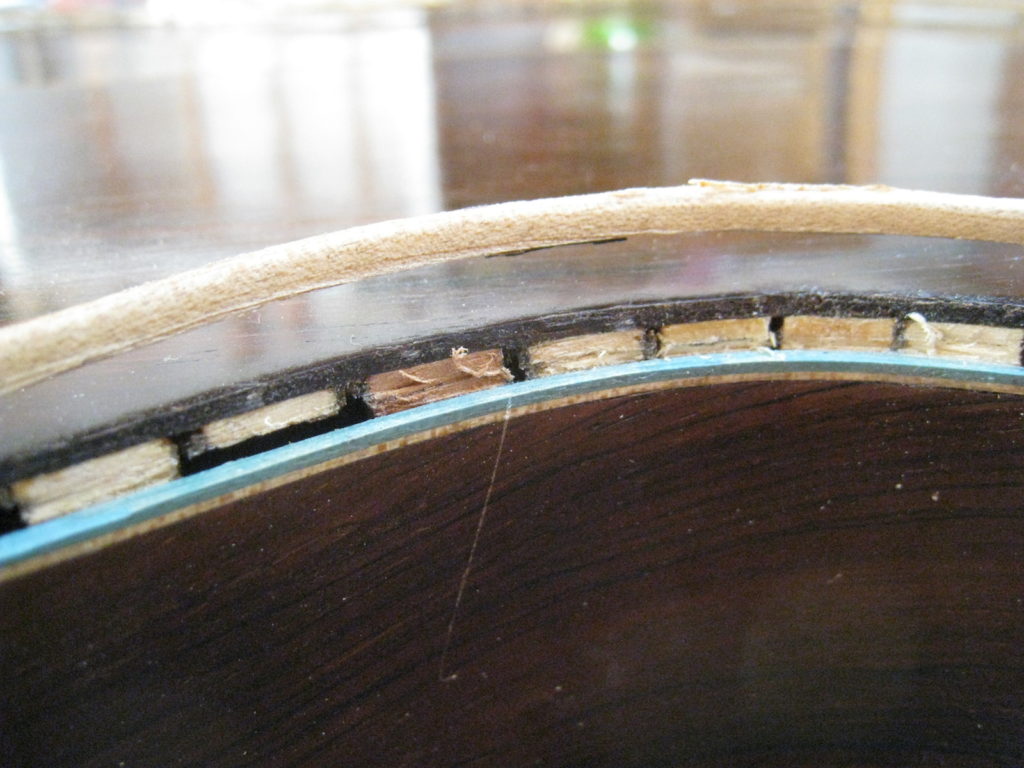
 continuous cedar. However when removing the binding I could see that they were individual spruce glue blocks. When I made a copy of this guitar (years before ever opening it) I put continuous reinforcements both visible inside the guitar as well as outside the inner back and inside the outer back. It was a struggle to see how to completely immobilize the inner back and I opted to glue in cut sections of reinforcement. Well, as always, this 19th century builder had a better idea than mine. He made the interior back even smaller than necessary and then glued triangular blocks wedged between it and the sides. These wedge glued to the sides provide the glueing surface for the outer back, the spanish peon. The inner back is imobilized so that we don’t have unwanted vibration and with some preparation we have the perfect surface to glue the outer back to. Now it is also clear that it was not such a bad idea to make a saw cut to remove the back since the triangular blocks are more delicate especially if they are
 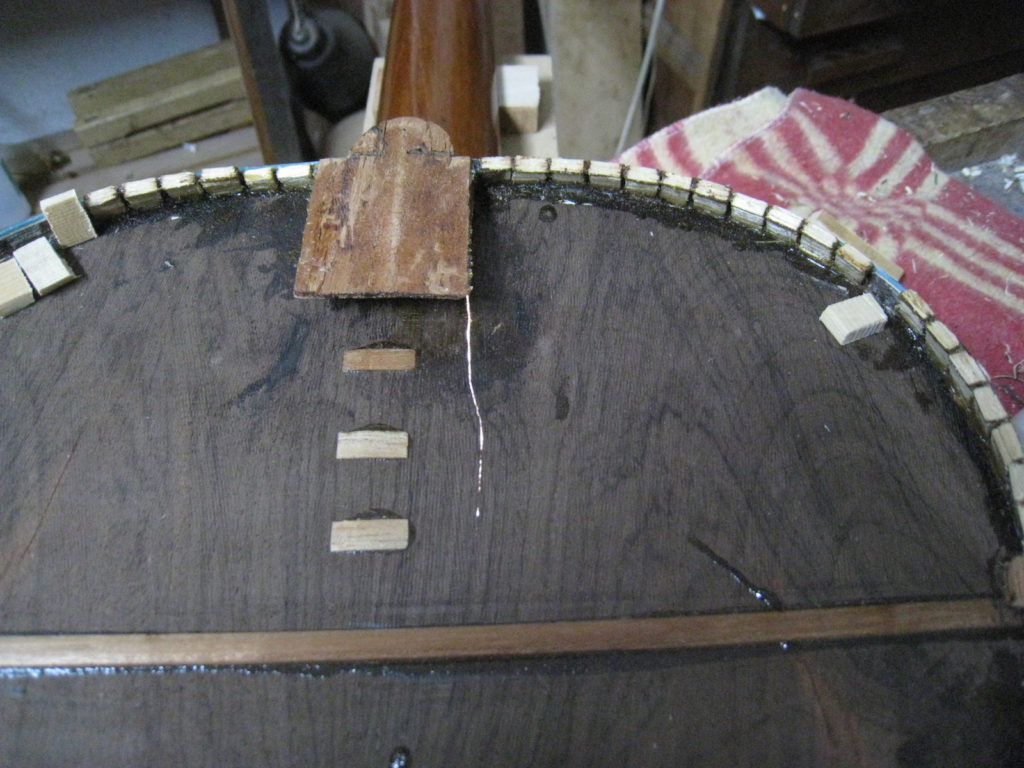 separated from each other as is the case here. Between the cut of the saw and my spatula some glue blocks were damaged and had to be replaced. Then, to give a slight curve to the back, the height of the blocks had to be increased so that we could plane or sand them to receive the back. The profile of the sides has to rise a little at the waist of the guitar. I did this by sanding the rim to level the repaired blocks and then gluing a spruce back on top to get the height lost by the cuts and repairs.
 This allowed me to use the plane to get the contour I need for a healthy domed back. After planing I was able to cut away the interior spruce leaving only a rim of spruces just thick enough to correct the curves.
The bars are now curved but a little less than in a new guitar, counting on the probability that the back does not continue to lose width as it ages. The only thing that remains it to couple the back and glue it, prepare the channel for the bindings, prepare the borders with the black and white fillet and glue them too. 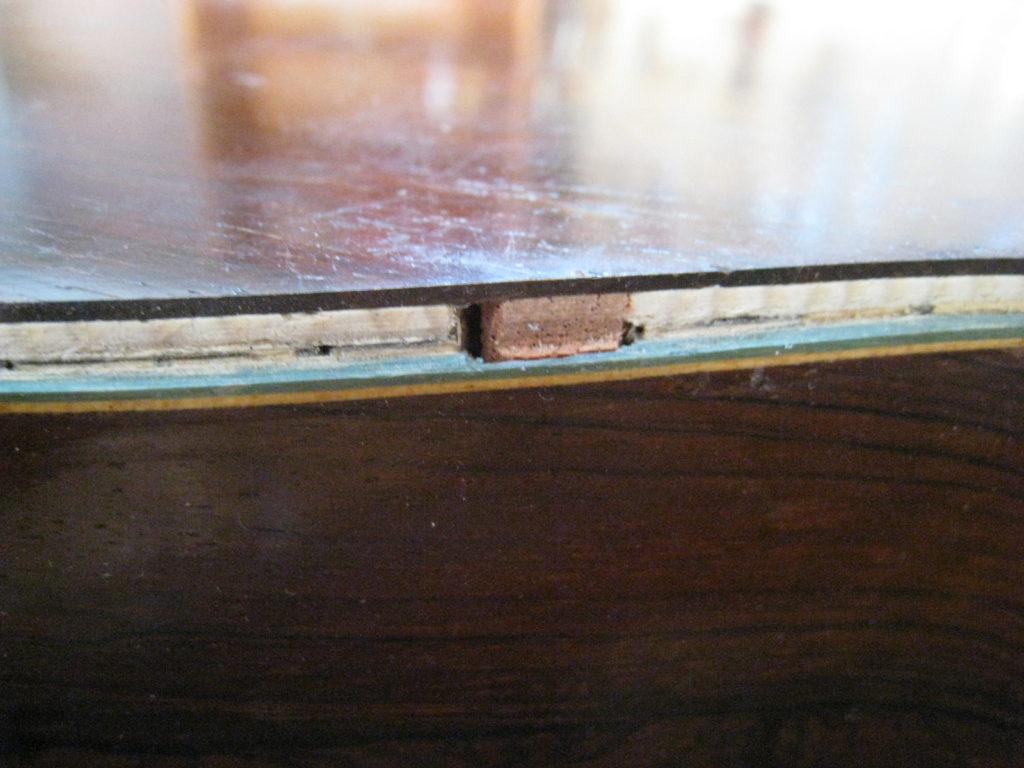
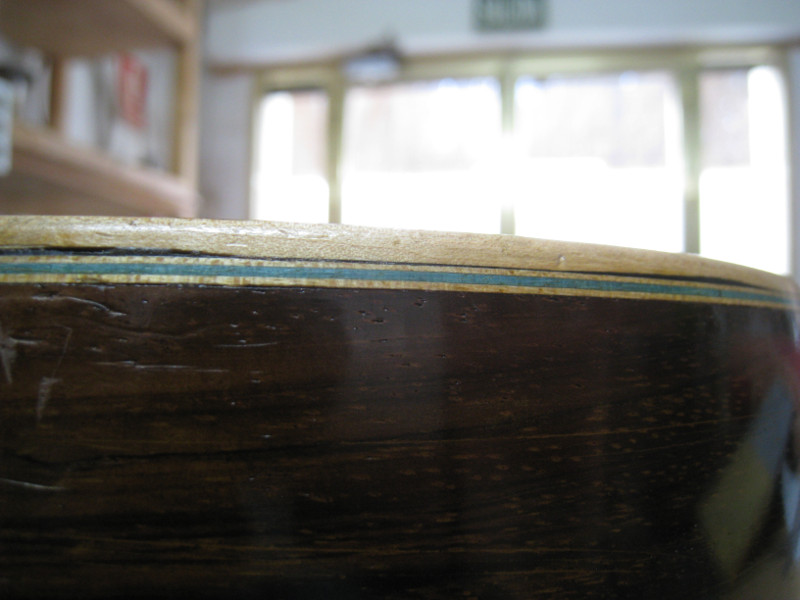
 We chose to leave the green fillet intact on the guitar due to the difficulty of finding or making the same green. The last step is always to re-polish the guitar which in this case was a bigger job than for most restorations.
Arias Restoration II
The back of this double back guitar had been removed and replaced in order to deal with some cracks which had developed over time. It was done many years ago and by someone who did not take the care that this instrument deserves. The first indication of this is a black veneer line which appears and disappears as it runs next to the binding.
The back was removed it seems by sawing through the purfling and sides on the black line. Although it must be extremely difficult to keep the saw within the limits of the black purfling, it would have been easy enough to remove all of the black and replace it once the top was glued back on. The other mistake made back then was a failure to register the curve of the back before taking it off. This can be done by checking the relationship of the back to the sides before taking the back off. Actually I compare the lift or angle which a straightedge placed on the edge forms with the plane of the back (as if the back were flat). Even a back (or top) which is sunken will conserve this relationship out at the edge where the reinforcements don’t sink. In this case the sides were planed flat to receive the flat, sunken back when it was replaced. I say all this not to criticize the repairperson but rather to explain later how I restored these elements.
 Firstly I removed the rosewood pins which had been used to locate the back in the previous operation by drilling them out. Knowing that I would be replacing the black veneer I choose to remove the binding from the guitar and take the back off by detaching it from the reinforcements instead of sawing through the way it had been done before. As soon as I did that I realized that sawing through had not been such a bad idea.
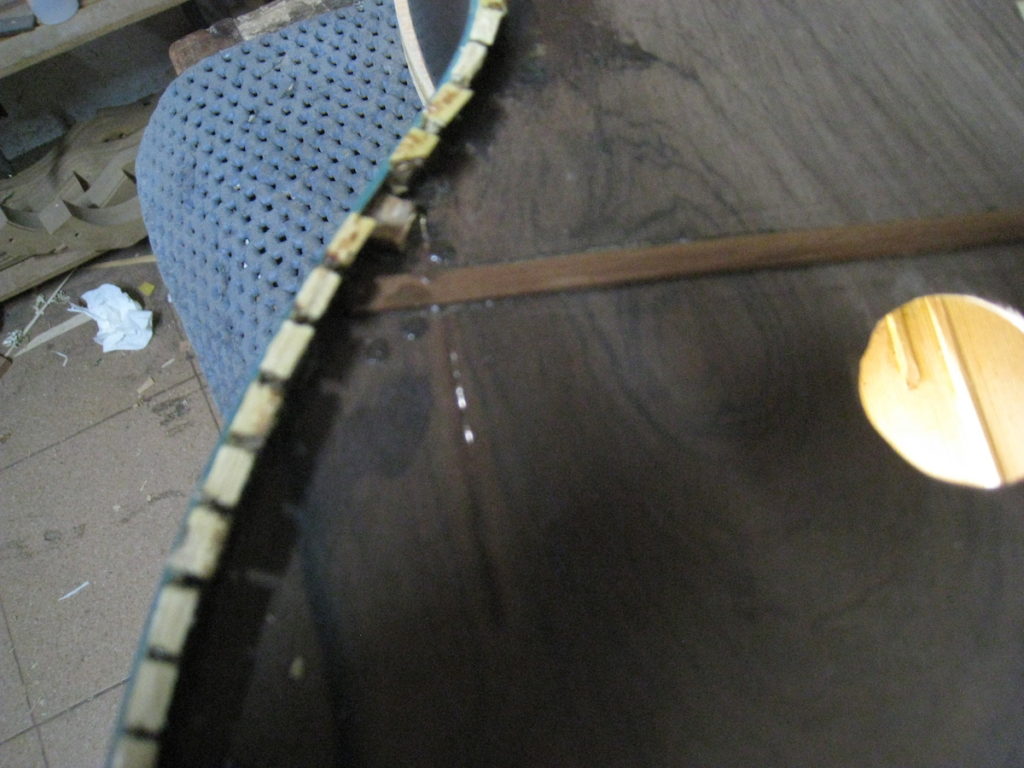
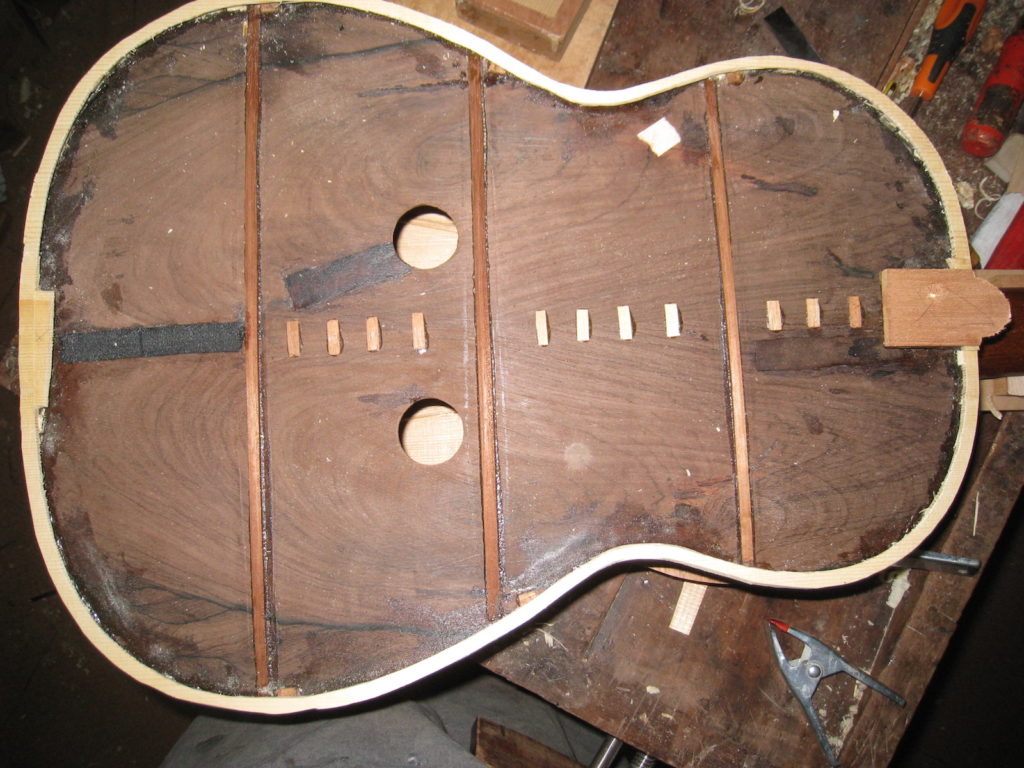
 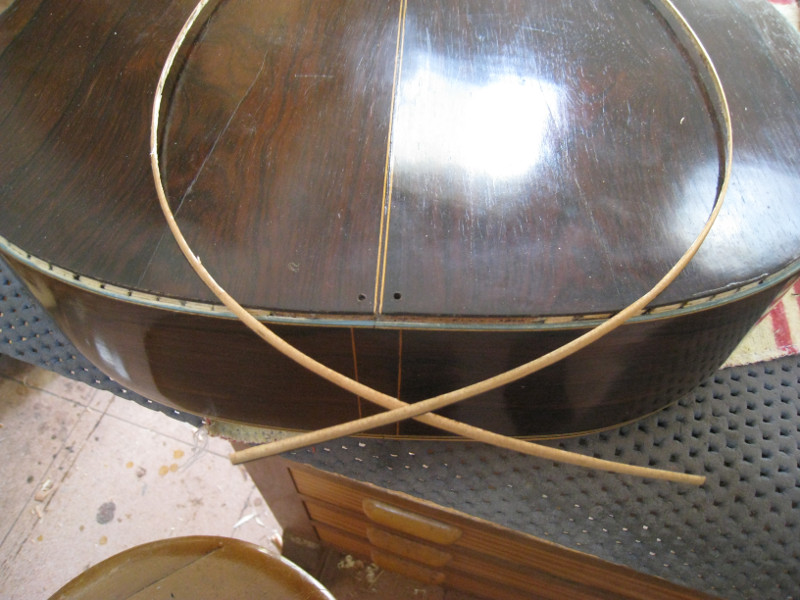 When I got the back off I saw that Arias had used triangular spruce blocks instead of reinforcements. The thin edges of these blocks are quite delicate and so sawing through them might have been better than separating the joint on each one. It took a lot of time but finally the back was off and only a few of the blocks had to be replaced. The outer back had three cracks and the seam was separated causing ugly splits in the white centre purfling. I chose to replace the centre strip with a slightly wider one which also served to widen the back enough in order to allow a curve and to keep it from spittling in the future. The back of a guitar tends to shrink over time and this will cause either splits or for the back to end up too small for the outline formed by the sides and the damage is visible where they meet.
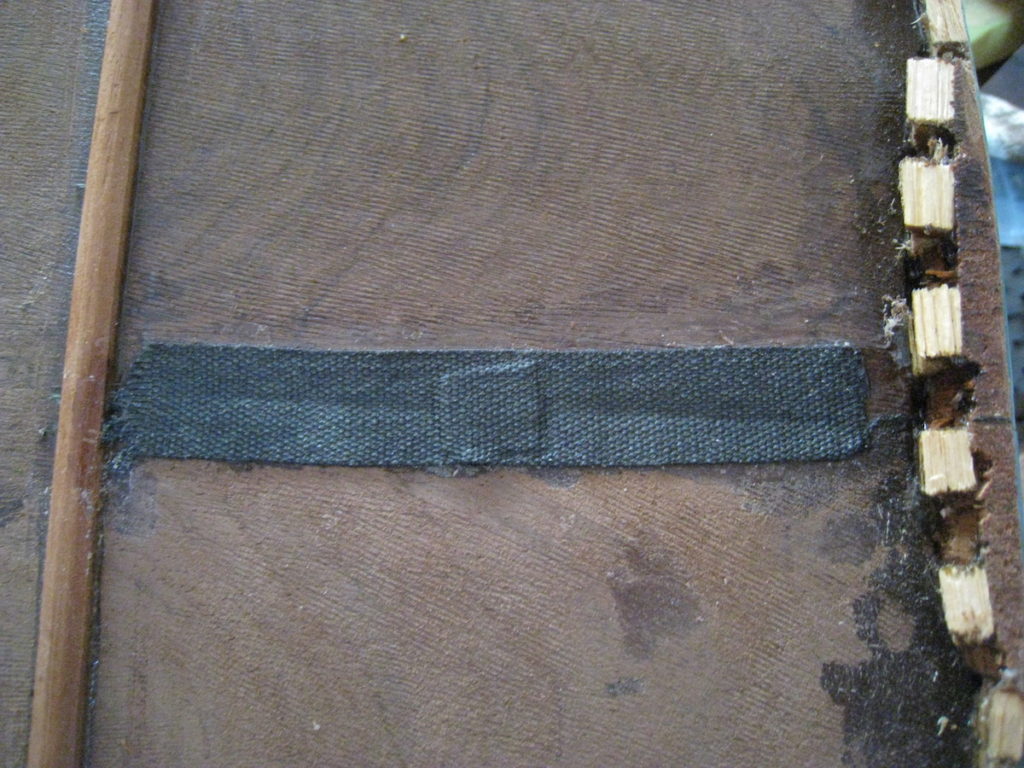
 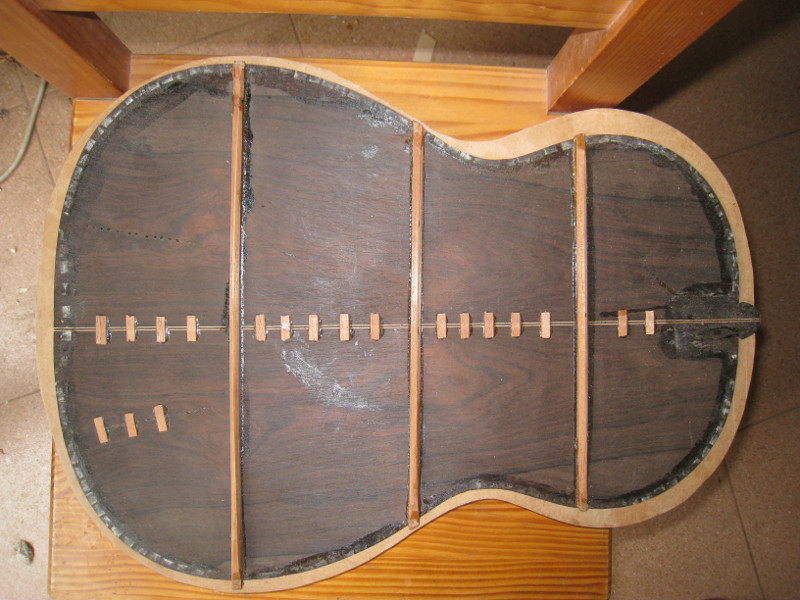 With the back off I could see the repairs that had been made and the possibilities that I had for restoration to the original state. The priorities were to secure any cracks, recuperate the width of and to restore the curve of the back. The back bars had to be removed because they were concave over their length and were holding the back into a negative curve. In removing the longest one I saw that cyanoacrylate glue had been wicked in through a hole in the centrestrip to deal with a loose spot between back and brace. That stuff is hard to remove! In order to reglue the two sides of the back to get clean purfling in the middle it was necessary to remove the cleats as well.
 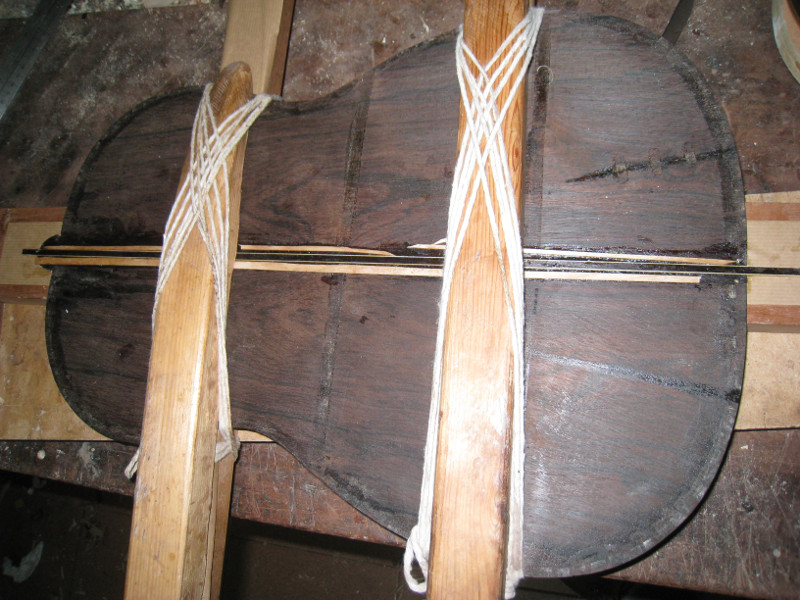 Once the two halves of the back were free I prepared a new centrestrip and jointed the back with the help of some old tricks to make sure that there would be no unevenness between the different elements. All efforts must be made in a restoration to avoid having to thin any further to even out irregularities and also having to re-varnish. The marks of Arias’ toothing plane were evident through the inside of the guitar so I didn’t feel too bad about using mine to ensure flatness of the surface before glueing on the cleats and the bars. This instrument seems to have been made with a very clear idea to make it as light as possible so I respected that idea and made the cleats the same size and shape and used cloth tape and hide glue to secure the cracks.
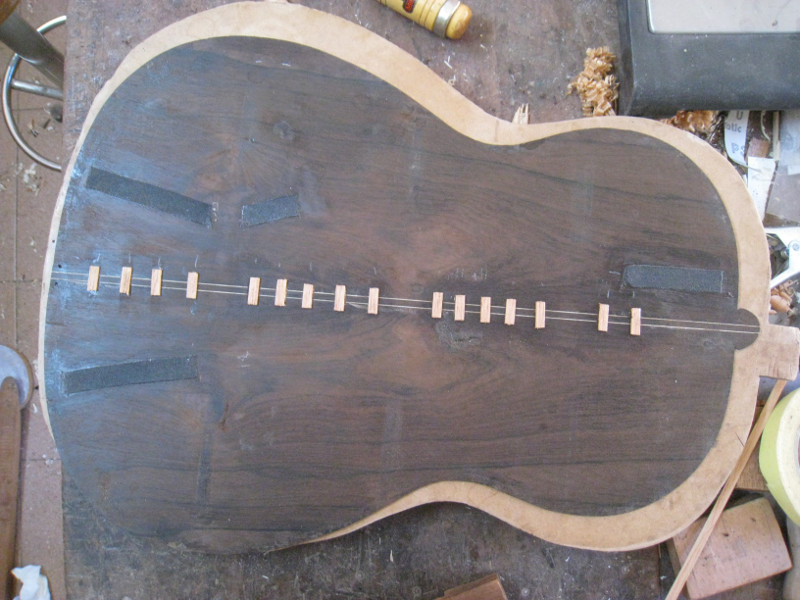
The bars could now be shaped to the curve I wanted and glued to the back. I had to guess at the curve but I have seen many instruments from this period and I chose to use as slight a curve as possible which is in keeping with what it might have had after 116 years of shrinking. Just two big jobs left to report on now: securing the interior back and preparing the sides for the outer back and glueing it on.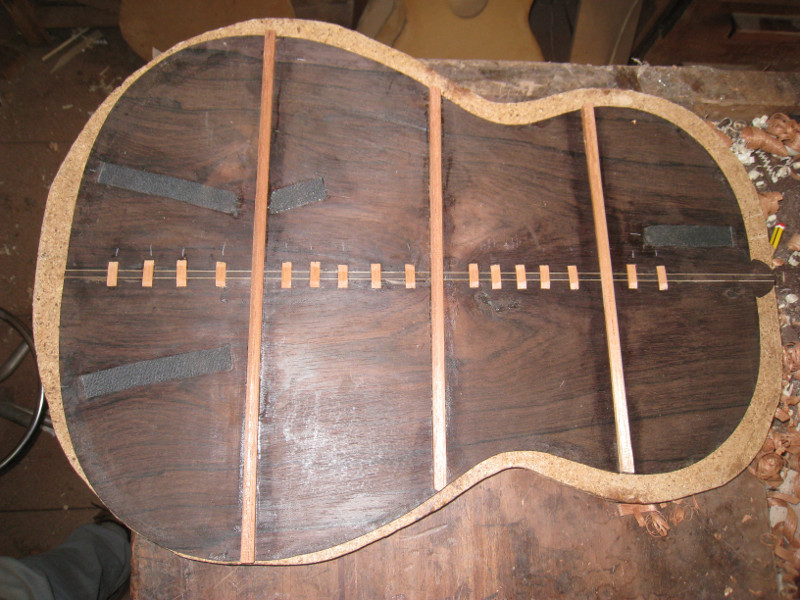
Restoration
 My position on restorations is that instruments should be conserved in the original state as much as possible. It puts me at odds with many musicians who feel (justifiably) that a guitar should be returned to playability above all else. We have learned so much from antique instruments and we could learn so much more, but with every modification we lose information about the original instrument and its maker. Documenting a restoration is a way to perserve some of this information but trusting the eyes and opinions of someone who worked on the guitar many years ago is often not enough. This problem is exacerbated by the fact that some restorations or repairs are undertaken by untrained individuals or even in the case of ethical professionals the criteria for restoration has changed over time and may continue to change in the future. What I might do today with the best intentions might in the future be deemed woefully misguided.
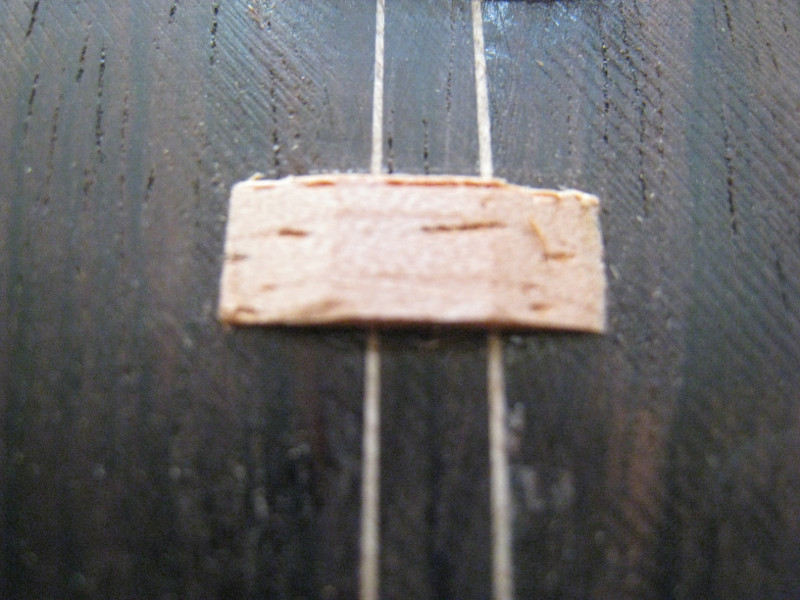
With all that in mind, I will tell you a bit about a recent restoration that I performed more in a way that made the instrument a better tool for the musician as opposed to prioritizing the preservation of the instrument in its original state. The first time I came across this guitar in 2010 it was suggested that I take the back off in order to properly restore it. I chose not to do that but rather to do only what was absolutely necessary to preserve the instrument. Since it was already playable that was good enough for Javier Riba (the owner) at the time. I re-fretted, secured some small cracks on either side of the fretboard, removed a tap plate and re-clamped the bridge which was lifting (although I did not remove it completely beforehand).The guitar has been used in many concerts since then and on an excellent recording for Tritó. Aljibe de Madera
The problems I chose not to address at that time included some cracks in the back which I was sure had been repaired, some back seam separation  and a general fragile nature to the guitar (worsened by the fact that the curve on the outer back had been destroyed by the back removal and the two backs sometimes touched). When the back was removed by someone else many years ago, some of the purfling had been destroyed as well. Now the bridge was once again lifting and Javier was feeling nervous every time he played the guitar. It was time to take the bridge off, remove the back and take care of all the problems there might be inside.
First I removed the bridge very carefully so as not to damage the top. The combination of a few factors made this job easier than I had thought it would be. The bridge is ebony which is notoriously difficult to glue well. The bridge was already lifting and I believe that this was not the first time that the bridge had been taken off. I say this because the top had some old glue-filled “divots” under the bridge. For a great joint you need both surfaces to be very even. 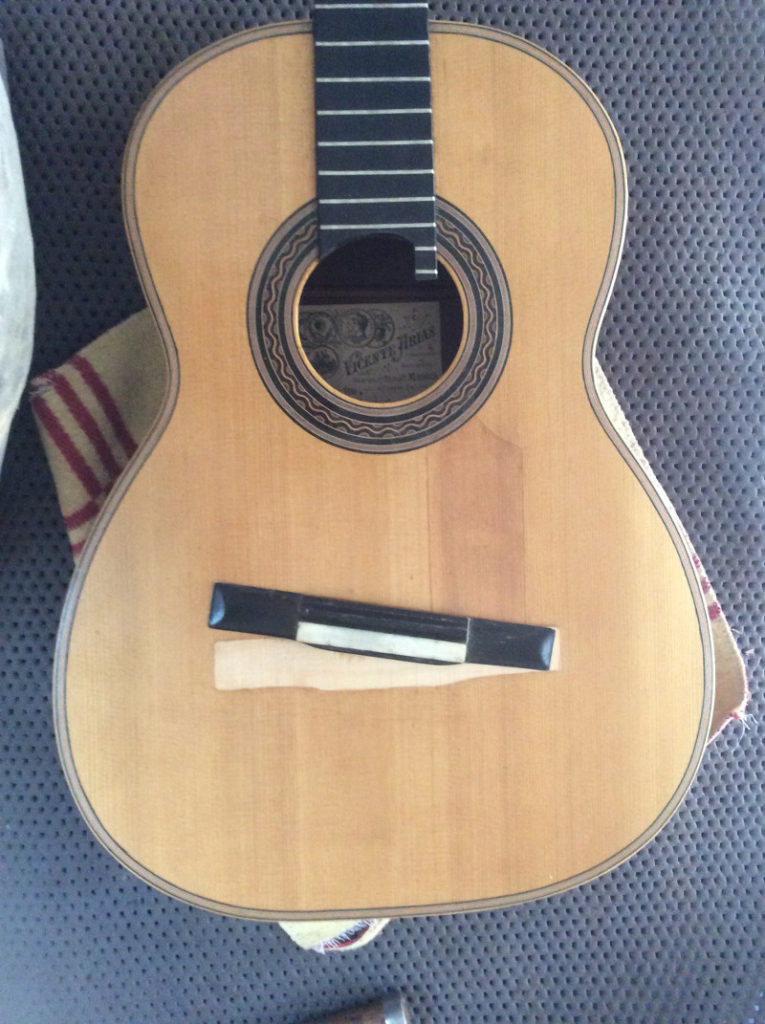 Once the bridge was off I was able to see just how deformed it was and how unrealistic it was of me to hope for a lasting repair just by adding glue and clamping as I did back in 2010. So, how to obtain two smooth and correctly shaped surfaces which I could then glue together? If I were to work the top smooth and shape the bridge to it as we do in construction, the bridge would end up lower causing incorrect action as well as losing some of its edges as deformation was quite considerable. Sanding the top is always unadvisable with a historically important guitar and in the case of a top with a thickness of 1.7mm, completely out of the question.
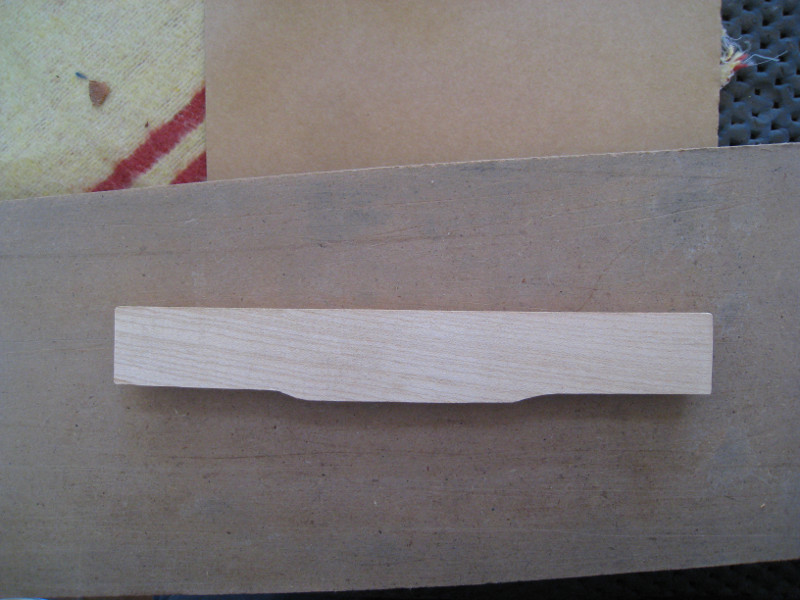 I was unwilling to glue ebony to ebony in order to make the bridge slightly higher so I used european beech to laminate a layer on to the bottom of the bridge which allowed me to work the bottom of the bridge into a curve which was mated to the top. The minimal edges of beech which were left showing were coloured black. In the photo below you can see the beech layer before trimming, shaping and dyeing.
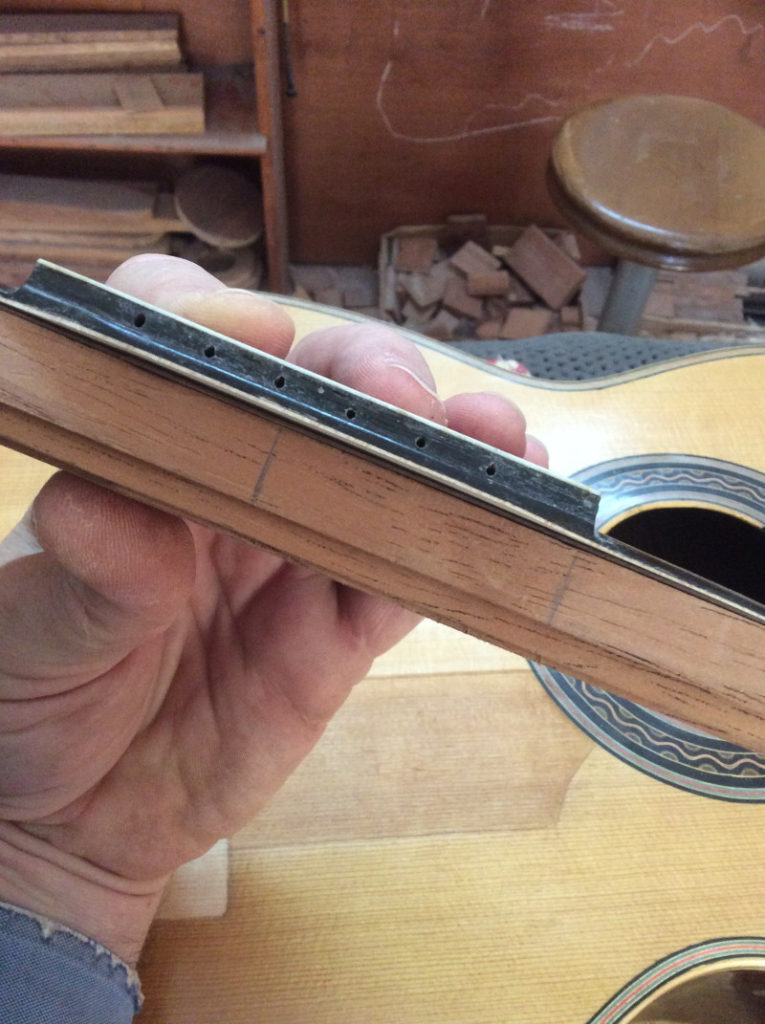
The top where the bridge was to be glued was not smooth enough to allow for a good glue joint so I used a small router to deepen the outline of the bridge just enough to get a surface which was in its majority smooth and free of irregularities. That turned out to be about 4 tenths of a milimetre. The flexibility of the top was so great that I didn’t think I could glue the bridge using only outside pressure the way we do here so I used bridge clamps. From what I could tell from the “grab” of the glue, the squeeze out and the finished product I think this joint will last the rest of the guitar’s life. I took pictures of the restoration of the rest of the instrument as well so I hope to share those in future posts.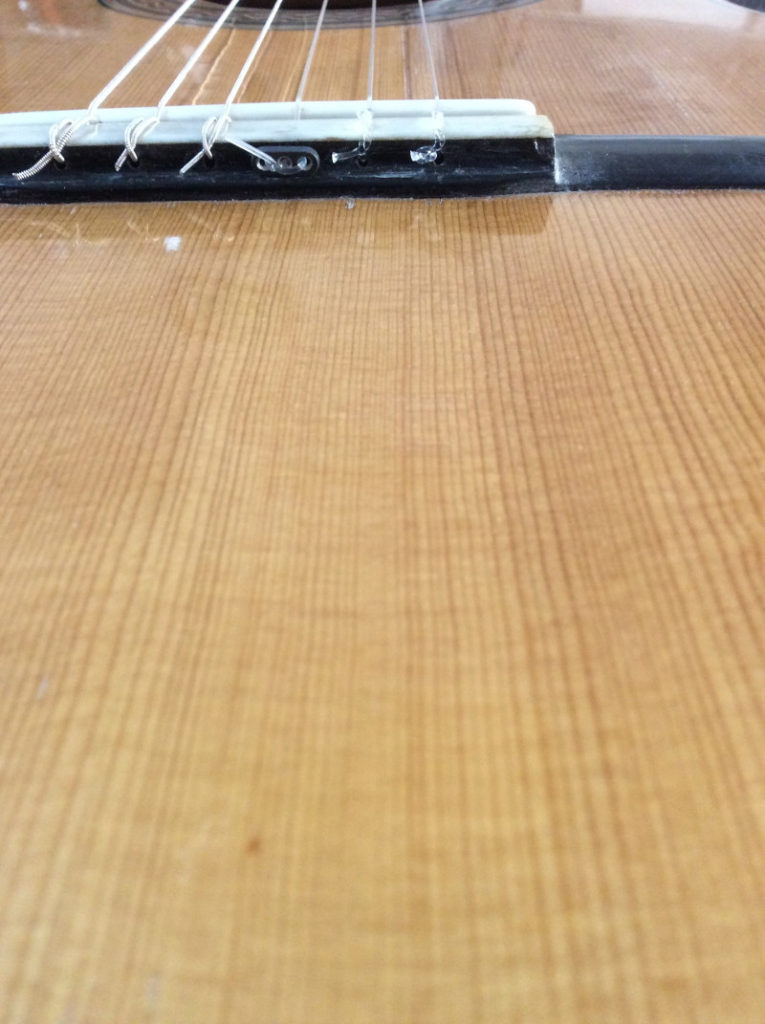
Artesania
A friend just finished a stint working for a local ice cream parlour and was telling us the other night about how they work. Just a few examples: The almonds they use are hand-sorted to ensure quality. The local strawberries are sourced from a single farmer. (Most of the strawberries in Spain are tasteless monsters often produced in greenhouses near Portugal.) This year they didn’t make their very popular blackberry ice cream because they couldn’t get enough of the fresh berries; frozen is not good enough for them. I myself have asked for orange sherbet and found on one occasion that it was not orange season so they didn’t have it and on another it was the beginning of the season and the oranges were still a bit tart. When I tasted it I was surprised to that this characteristic showed up in the delicious final product. This friend was very impressed with other aspects of how the business was run.
The spanish word “artesania” is much used and much abused but in its origin it referred to the traditional workshops where a trained professional produced functional articles that by their nature were unique and creatively made. These workshops were often associated and regulated through guilds. Ceramics, carvings, ornate furniture, leather goods, wrought iron, goldsmiths, blown glass, marquetry and instrument-making are just a few examples. These artisans persisted because there was a need for the product, the quality was very high and of course cheap industrial processes did not exist. In different historic periods there have been resurgences of artisanry for reasons of increased wealth and patronage by the nobility. Those examples that have survived into today’s industrial world have done so usually because of the quality of the work and the demanding clientele who are not satisfied with what industrial production has to offer. In order to make a living at such a time-intensive occupation the artisan must be well-organized, efficient and must be able to charge much higher prices for his products than the same product produced in an industrial setting.
My favourite example is, of course, guitar-making and one of the oldest examples of this tradition can be found right here in Granada. Fine guitars are often referred to as “handmade” in part as a translation of the spanish term “artesanal” but the definition of the spanish term is not about the absence of machines but rather the absence of industrial processes. Artisans of old used the best technology they could and often showed great ingenuity in developing new ways to lend more efficiency to the work without detriment to quality. I dislike the term handmade because it gives the impression that we use no machinery in our work. We too use the best technology we can but we control every step and integrate it into the whole process. In most cases the guitar-makers here work alone unless they have an apprentice. It is this hands-on, total responsibility for the process that makes these guitars so much better than a factory product. As I have said before, the factories will never reach the quality that we can for the simple fact that profits will always be the driving force. They can theoretically train someone to make a guitar as good as ours but when they see the time it takes that one person to produce one guitar while their production lines do nothing (for that guitar) it doesn’t make economic sense. So they will take advantage of the production lines for the less important tasks until they realize that in guitar-making every task is of the utmost importance. Now back to the ice cream analogy: the quality of the ice cream I was talking about earlier is fantastic, their dedication to quality, sustainability and eco-friendliness pays off and everyone wants their ice cream (much more expensive than the competition of course). In my mind it is this constant striving for quality that makes the handmade guitar so much better. So, the definition of handmade must be qualified to refer to the process of one maker choosing the wood, seasoning it, using his tools (electric and otherwise) to thickness the components, design and bring to fruition the aesthetics of the instrument, and most importantly transform the pieces of wood into something magical which has the potential to stir our emotions like nothing else.
Here is a video made with a guitar which inspired me to make a copy of it this year.
Deuxième Arabesque de Claude DEBUSSY (arrangement: J. Riba)
“In the spring of 1913, Andrés Segovia decided to seek his fortune in Madrid, and gave a recital in the Ateneo the evening of May 6 […] The programme did not seem so different from those of the followers of Tárrega but it contained a surprising novelty: The transcription—by Segovia himself—of the second of the Deux Arabesques for piano by Claude Debussy […] This audacious move revealed very clearly the aspiracions of the young Segovia to place himself in a different category than the rest of the guitarists — looked down on by musicians and practically ignored by learned audiences—and his intention to play a leading role in the artistic circles of his time.”
Angelo Gilardino,
extract from the liner notes to the CD “Aljibe de Madera,
Homenaje a Andrés Segovia” Tritó TD0094